Install Debian 11 Using the Graphical Expert Install - Page: 7
By: Edward Kimmel
Page Quick Links
The “Debian installer main menu” – Part 6
Overview
In this section of the Debian installer main menu we will detect the storage disks that are installed in your computer and then we will partition them to configure your Debian 11 OS file system. Most people will create the file system all within the ‘/‘ (root) directory because it is easy for beginners or they are using just one drive. I will show you how to set up your filesystem using multiple partitions for a custom installation using either a single or multiple disks. The file system will be created using a Standard Partition and Logical Volumes that are created within two Volume Groups. A volume group can be configured on a single disk or span multiple disks. The Logical Volume Manager (LVM) will be used to create the two Volume Groups. The server I’m building has three disks, a 240GB SSD (Solid State Drive) for the ‘/boot‘ Standard Partition and also uses Volume Group 1 (VG1) for the ‘/‘ (root), ‘/home‘, ‘/tmp‘ and ‘/swap‘ Logical Volumes, and two 4TB disks used to create Volume Group 2 (VG2) that will span both drives to create 8TB of partition space for the ‘/var‘ directory.
Basics of Disk Partitioning
Unix / Linux file system descriptions:
- / (root) – In a computer file system, and primarily used in the Unix and Unix-like operating systems, the root directory is the first or top-most directory in a hierarchy. It can be likened to the trunk of a tree, as the starting point where all branches originate from.
Partition Size: 15GB-64GB (Desktop or Server) - /boot – In the Unix and Unix-like operating systems, the /boot/ directory holds files used in booting the operating system. The usage is standardized in the Filesystem Hierarchy Standard.
Partition Size: 50MB-1GB (Desktop or Server) - /home – A home directory is the directory or folder commonly given to a user on a network or Unix and Unix-like operating system. With the home directory the user can store all their personal information, files, login scripts, and user information.
Partition Size: 8GB Min for Server 32GB Min for Desktop (Will depend upon Application) - /var – contains variable data files. This includes spool directories and files, administrative and logging data, and transient and temporary files. Some portions of /var are not shareable between different systems.
Partition Size: Will depend upon Application, Desktop or Server - /swap – Swap space in Unix and Unix-like operating systems is used when the amount of physical memory (RAM) is full. If the system needs more memory resources and the RAM is full, inactive pages in memory are moved to the swap space. While swap space can help machines with a small amount of RAM, it should not be considered a replacement for more RAM.
Partition Size: Will depend upon amount of existing RAM. General rule to follow will be RAM <= 2GB then SWAP = 2 X RAM (example 2GB RAM = 4GB SWAP). If RAM > 2GB then SWAP = RAM + 2GB (example 16GB RAM = 18GB SWAP). - /usr – usually contains by far the largest share of data on a system. Hence, this is one of the most important directories in the system as it contains all the user binaries, their documentation, libraries, header files, etc…. X and its supporting libraries can be found here.
Partition Size: Will depend upon Application, Desktop or Server - /srv – The /srv directory contains site-specific data that is served by this system. This is pretty generic.
Partition Size: Will depend upon Application, Desktop or Server - /tmp – The /tmp directory in Unix and Unix-like operating systems contains necessary files that are temporarily required by the system as well as other software and applications running on the machine. For example, when you are writing a document, all the content inside that document is saved as a temporary file inside the /tmp directory.
Partition Size: Min 4GB Desktop or Server
The most popular created partitions used by most administrators are ‘/‘ (root), ‘/boot‘, ‘/home‘, ‘/tmp‘, ‘/var‘ and ‘/swap‘. I will use these popular partitions in my Debian 11 OS file partitioning example to follow.
I recommend that you would use this for your computer’s hard drive storage. You should use a SSD drive (Solid State Drive) as stand alone for desktop computers, especially if used for playing games as it will have the fastest access and write speeds. If you are going to use multiple drives to configure a file or web server computer, then you should use a SSD drive for the boot drive. I will place the ‘/‘ (root), ‘/boot‘, ‘/home‘, ‘/tmp‘ and ‘/swap‘ partitions on the SSD drive and use additional traditional drives for the ‘/var‘ partition.
Detect Installed Disks
While at the Debian installer main menu, select Detect disks and click Continue.
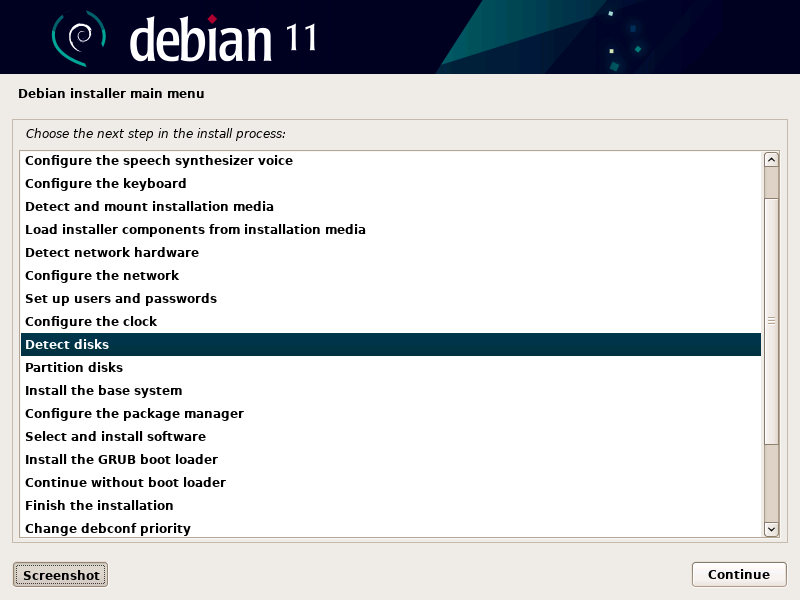
The Debian installer will detect the disk(s) installed in your computer.
Partition The Server’s Disks
While you are at the the Debian installer main menu. Let’s get started creating the partitions to make our custom file system, select Partition disks and click Continue.
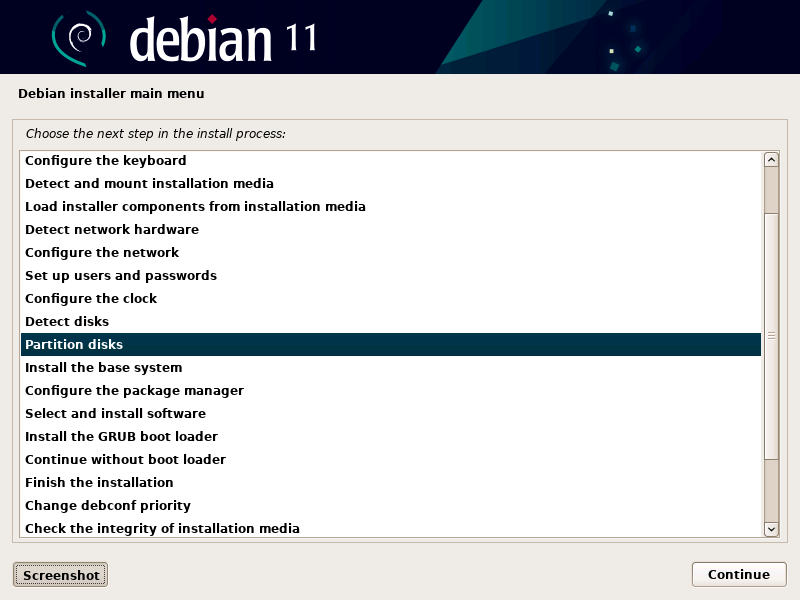
Partitioning Method
You will see 5 options to partition your file system, 4 will be guided and 1 will be manual. We will use the manual option.
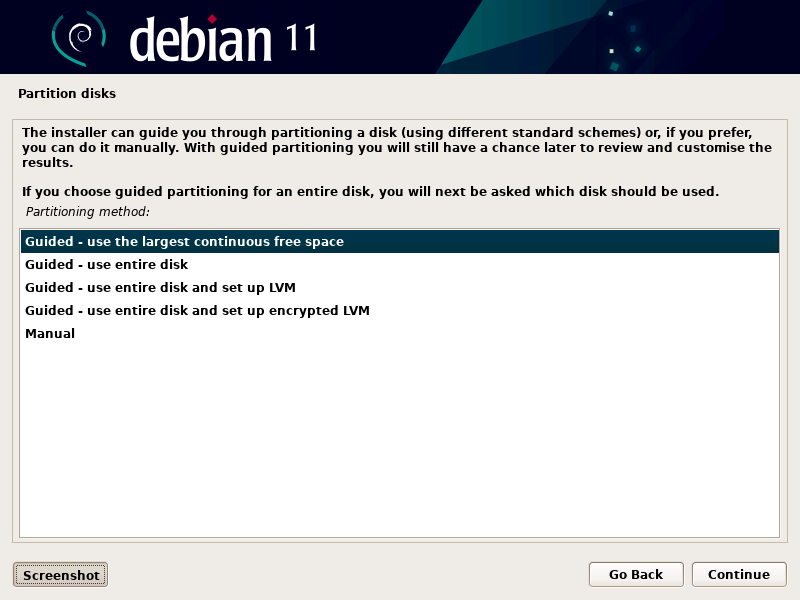
Manual Disk Partitioning
At the Partitioning method menu select Manual and then click Continue.
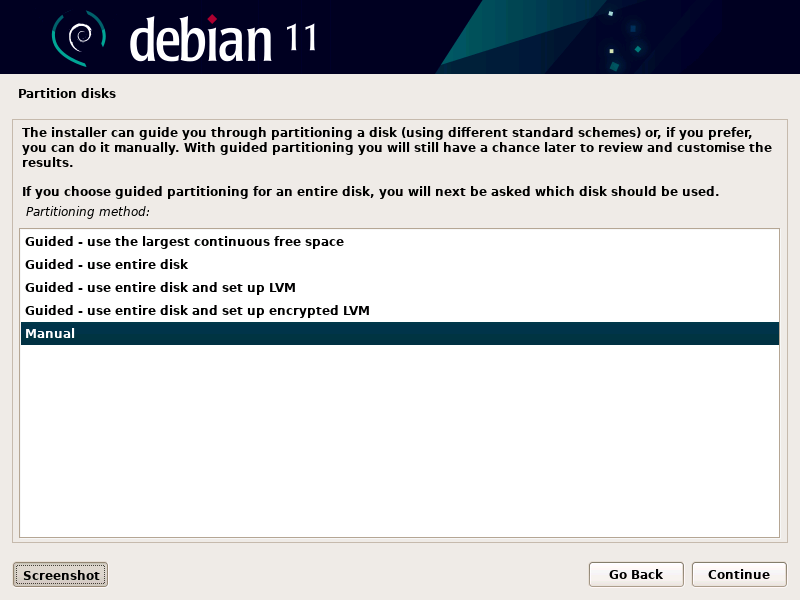
Partition Disks Main Menu
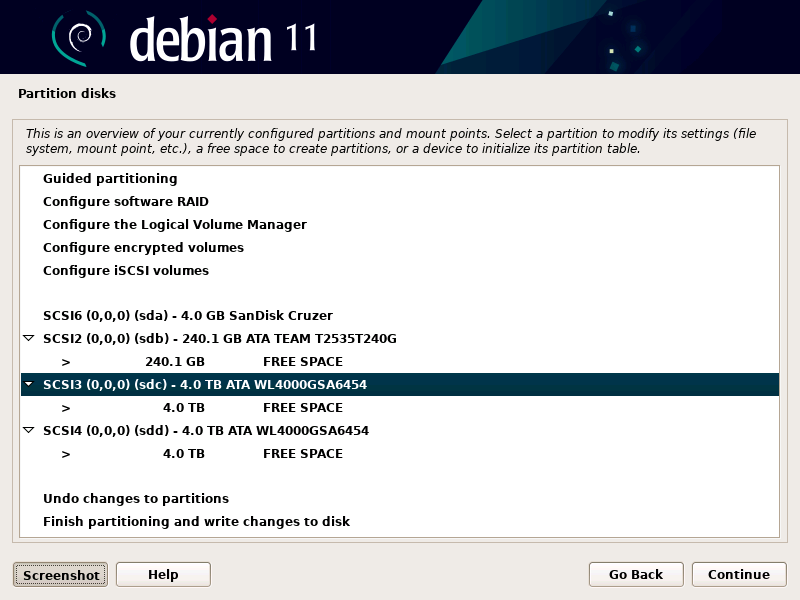
Now you are at the Partition disks main menu. You can perform many functions from this screen such as create a standard partition from free space, modify an existing partition’s settings, or initialize a device’s partition table. You can also start special operations such as configure software RAID, configure the Logical Volume Manager, configure encrypted volumes and configure iSCI volumes. The RAID configure and creating iSCI volumes is beyond the scope of this tutorial. You can see all of the disks that were detected in the previous step, this list also includes the the Debian 11 OS installation USB flash drive (sda).
In the computer that I am building you can see the 240GB SSD drive (sdb) I will use as the boot drive and two 4TB standard drives (sdc and sdd) I will use for storage drives. Once the installation is complete the drive order will change and the SSD drive will become the boot drive (sda).
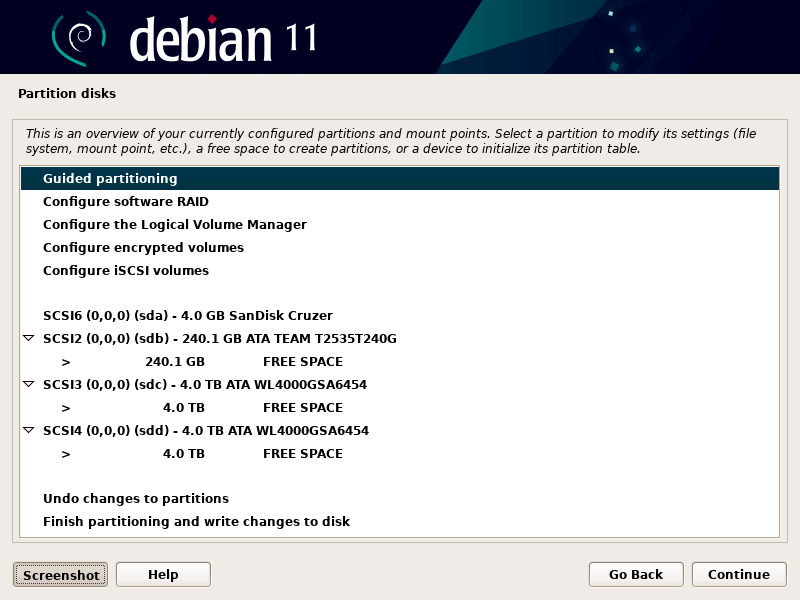
Initialize Disk Partition Table
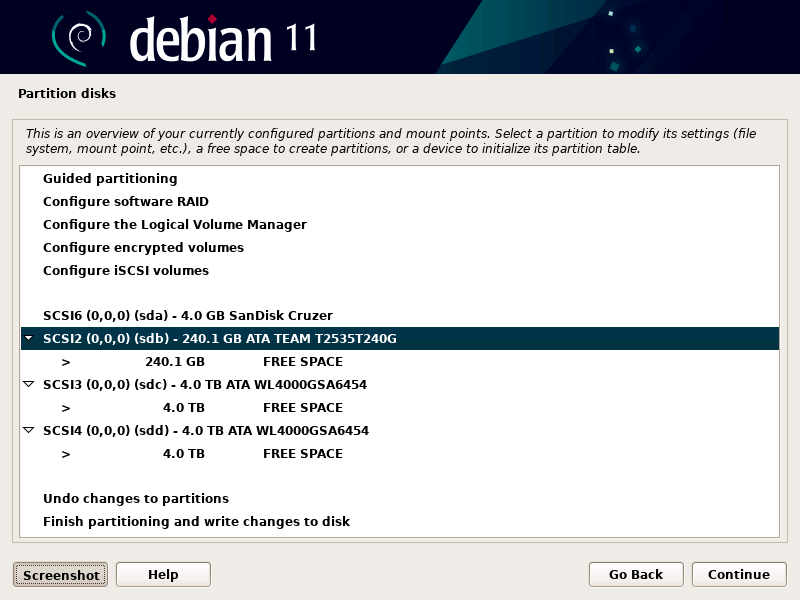
The first thing I will show you will be how to initialize the partition table in each of the drives installed in my computer. We will start with the 240GB drive by selecting it and then click Continue.
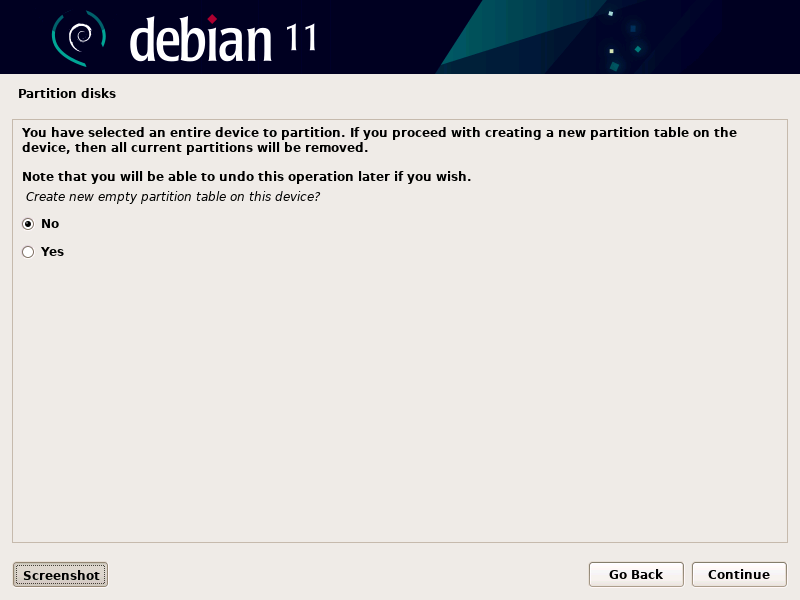
You be asked if you want to Create new empty partition table on this device, default is No.
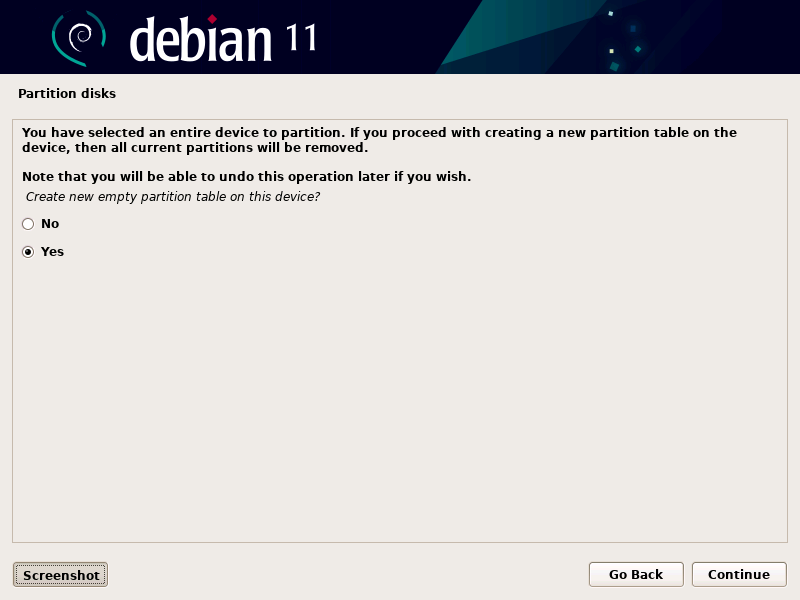
Note: the current disk partition table will not be overwritten at this time so you can cancel this operation if you change your mind.
Select Yes and then click Continue.
Next you will need to select the type of partition table you want to create. Here is a brief description of each of the selections:
aixprovides support for the volumes used in IBM’s AIX (which introduced what we now know as LVM);amigaprovides support for the Amiga’s RDB partitioning scheme;bsdprovides support for BSD disk labels;dvhprovides support for SGI disk volume headers;gptprovides support for GUID partition tables;macprovides support for old (pre-GPT) Apple partition tables;msdosprovides support for DOS-style MBR partition tables;pc98provides support for PC-98 partition tables;sunprovides support for Sun’s partitioning scheme;loopprovides support for raw disk access (loopback-style) — I’m not sure about the uses for this one.
As you can see, the majority of these are for older systems, and you probably won’t need to create a partition table of any type other than gpt or msdos.
You will have to go with gpt if you want to use more than 7 partitions on the disk or if you have drives > 2Tb. The msdos is the default selection.
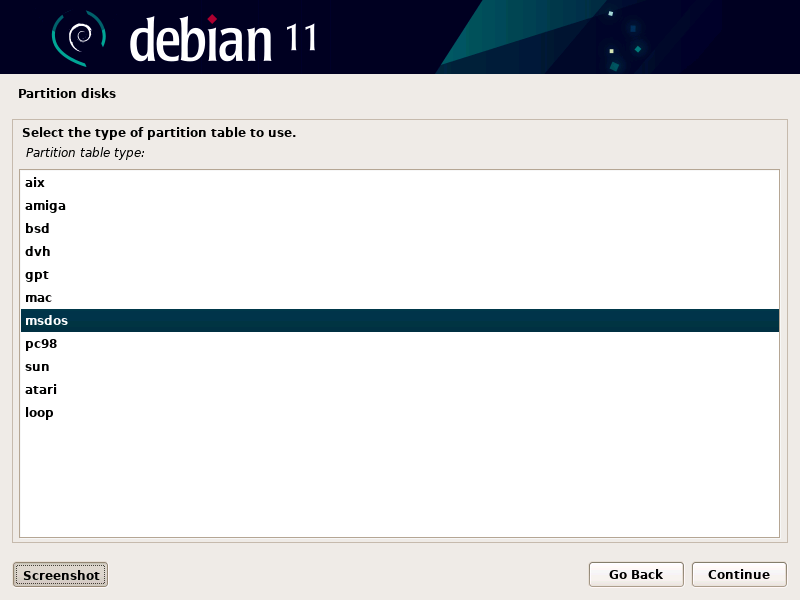
From the Partition table type list, select the table type you want to create and then click Continue. I will use the gpt partition table type.
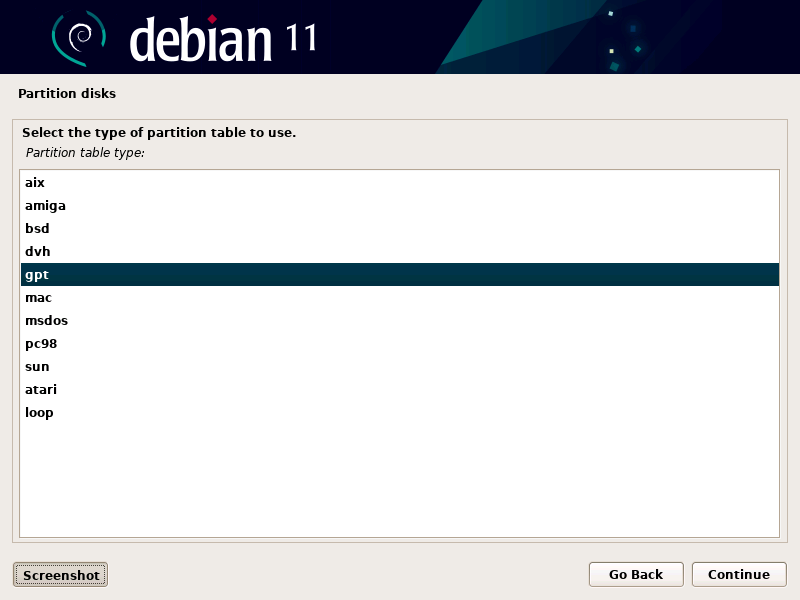
You will return back to the Partition disks main menu. I will perform the same previous steps on each of the 4TB drives. Since they are > 2TB I will have to use gpt partition table type.
Standard Disk Partition
Now that we have created new gpt partition tables in each of the drives, it is time to start partitioning the drives. We will start with the computer’s boot drive first, this should be a SSD drive to ensure a fast startup when the computer is powered on. We will start by creating a Standard Partition for the ‘/boot‘ partition. Select the SSD drive by highlighting the line with ‘FREE SPACE‘ and then click Continue.

From the list of options select Create a new partition and then click Continue.
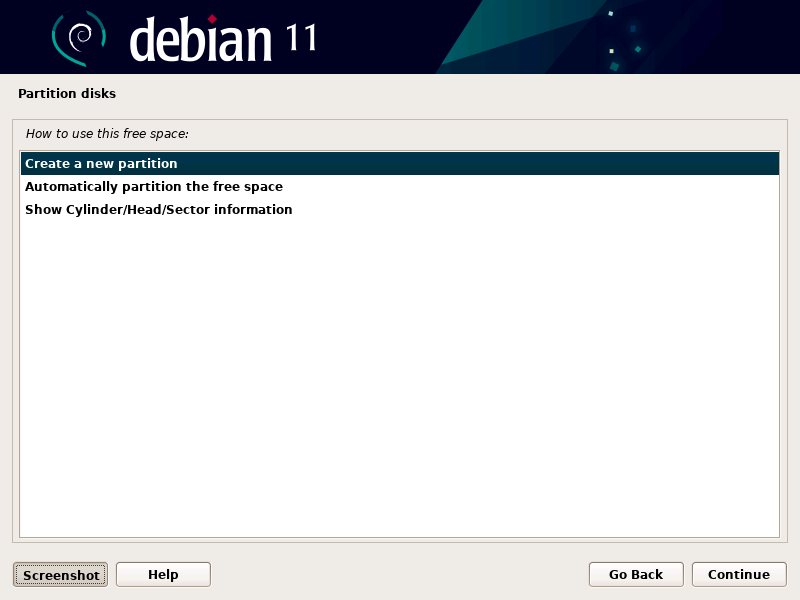
Now you must enter the size of the partition, you will see the amount of free space available in the drive by default. You can enter a number and use “MB” for megabytes, “GB” for gigabytes, or “TB” for terabytes. You can also enter a percentage such as 20%. If you enter a stand alone number it assumes you mean “magabytes”.
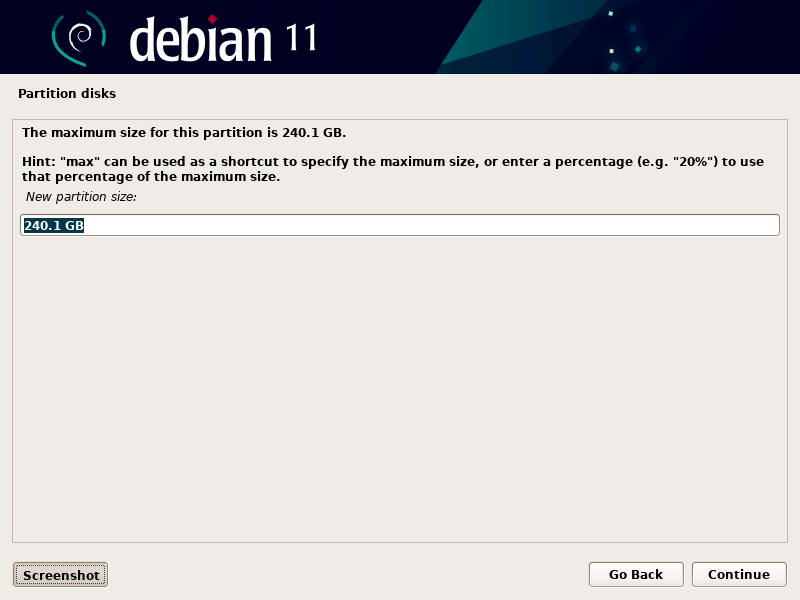
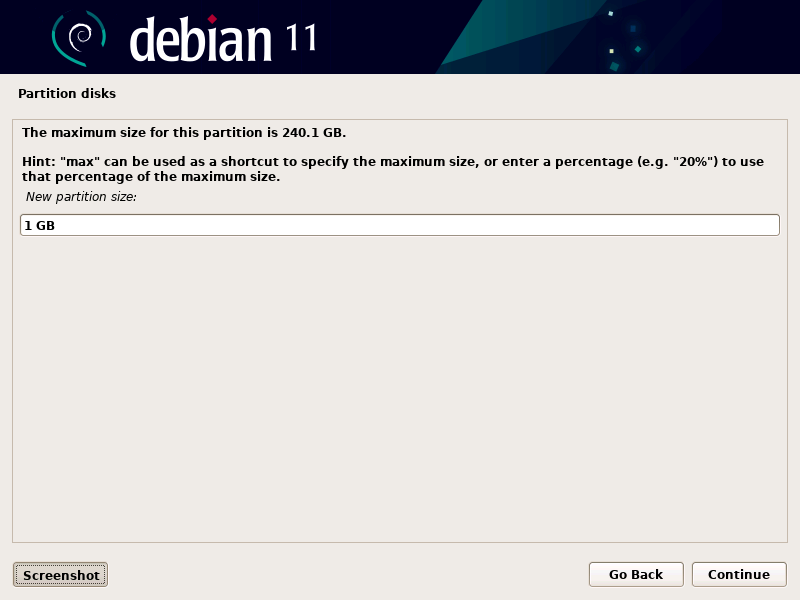
I’m going to enter “1GB” for my New partition size because I want a 1 GB partition to be used as my “/boot” partition. The recommended size is 50MB-1GB.
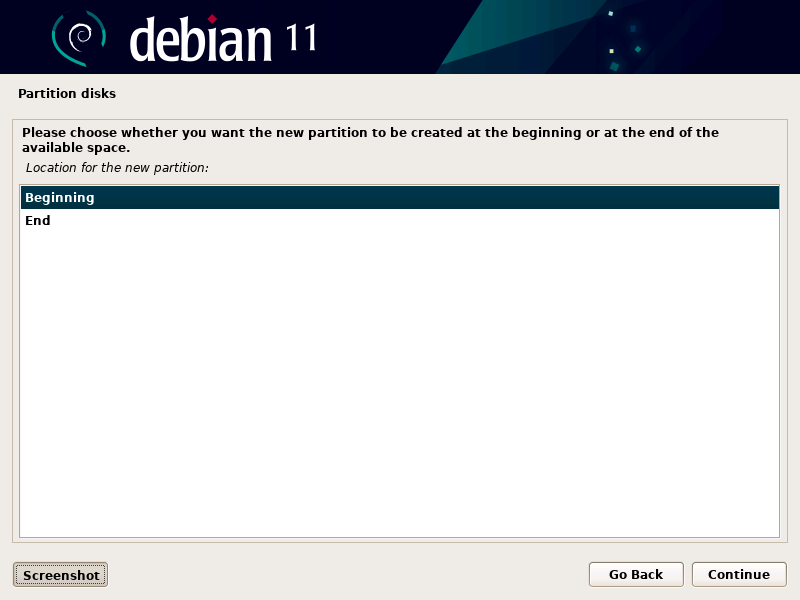
Next you will be ask where you want to place your partition starting at the Beginning or End of the free space in the drive. I would always choose the beginning for all of the partitions you are going to create. Select Beginning and then click Continue.
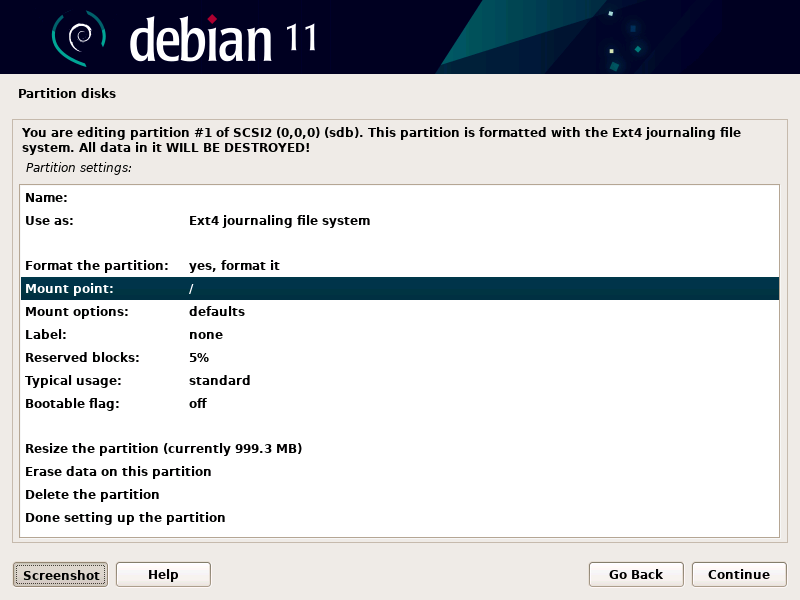
Now you will see an overview of the partition’s settings you are creating. You will see the Name of the drive, Type of File System to use, The Mount point, Mount options, Label, Reserve blocks, Typical usage and Bootable flag.
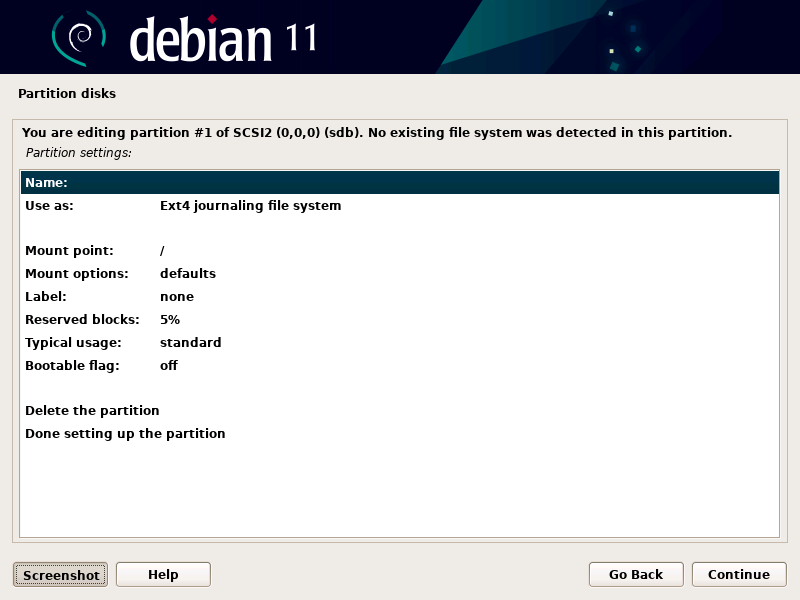
We must change the default Mount point from ‘/‘ (root) to ‘/boot‘. Highlight the Mount point line and click Continue.
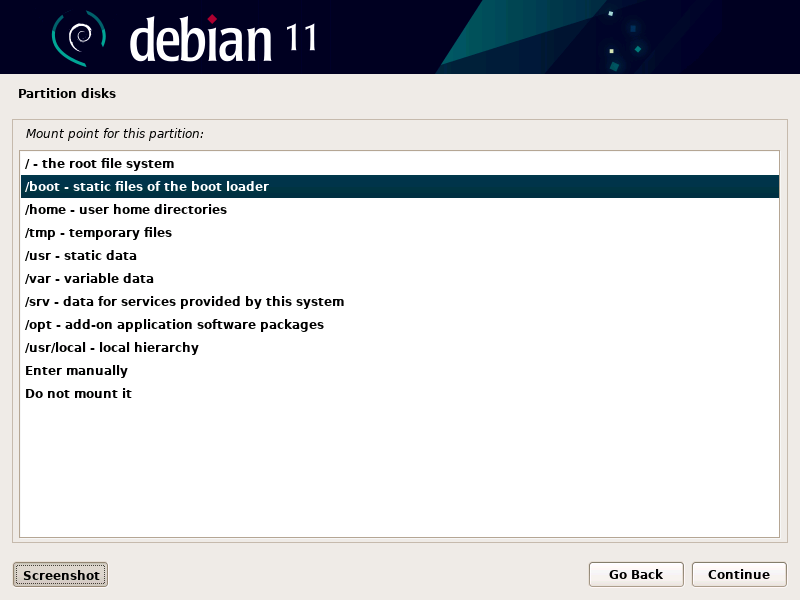
Select ‘/boot – static files of the boot loader‘ from the list and then click Continue.
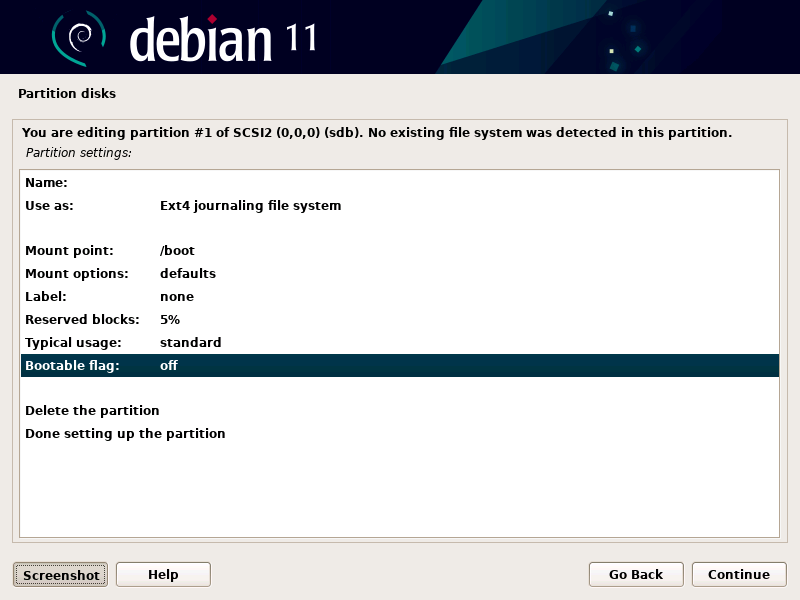
Since this is going to be the boot partition, you should make it ‘bootable’ by setting the Bootable flag to on. Highlight the Bootable flag line and then click Continue. It should change to on but for some reason unknown to me it doesn’t in some cases, don’t worry though, the newly installed Debian OS will boot after the installation even if this shows off.
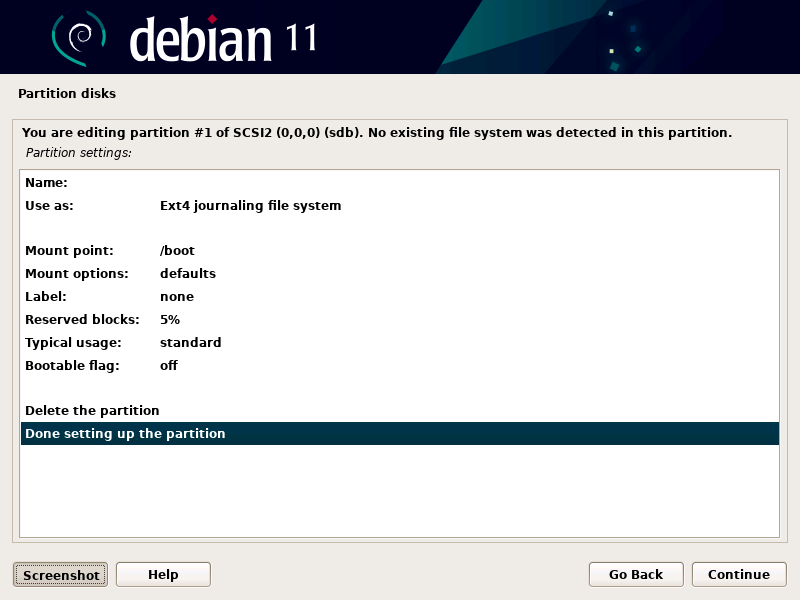
We are done setting up the ‘/boot‘ partition, select Done setting up partition and then click Continue.
Logical Volume Manager
Now we are going to use the Logical Volume Manager to create the ‘/‘ (root), ‘/home‘, ‘/tmp‘ and ‘/swap‘ partitions. Select Configure the Logical Volume Manager and then click Continue.
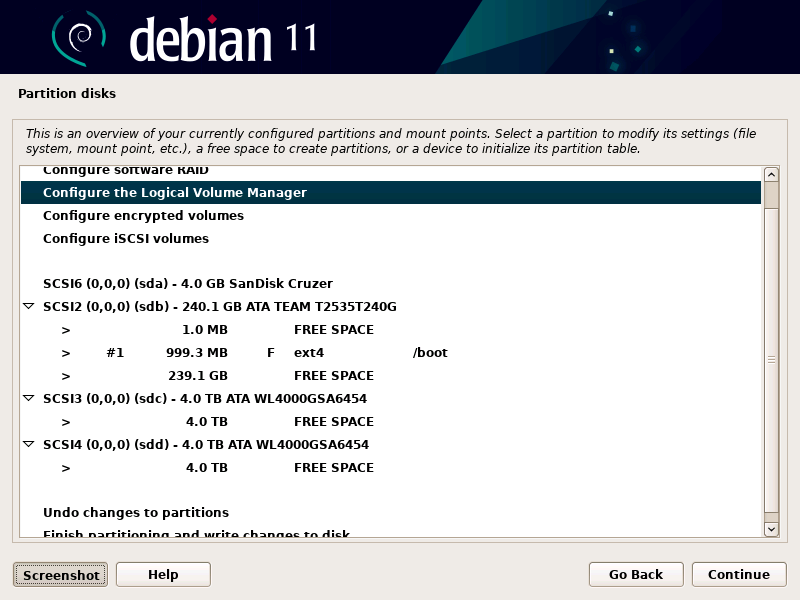
You will be ask to Write changes to disks and configure LVM before you can proceed. To prevent accidentally overwriting your data, the default is No.
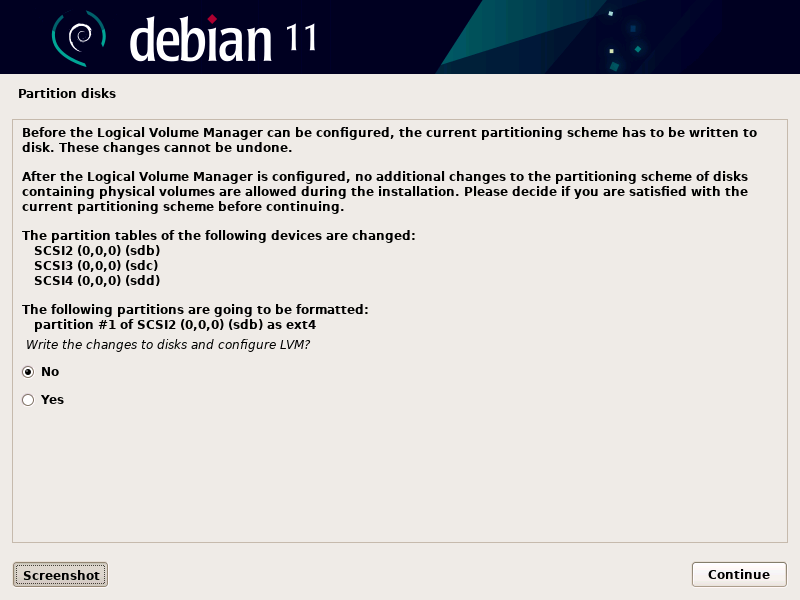
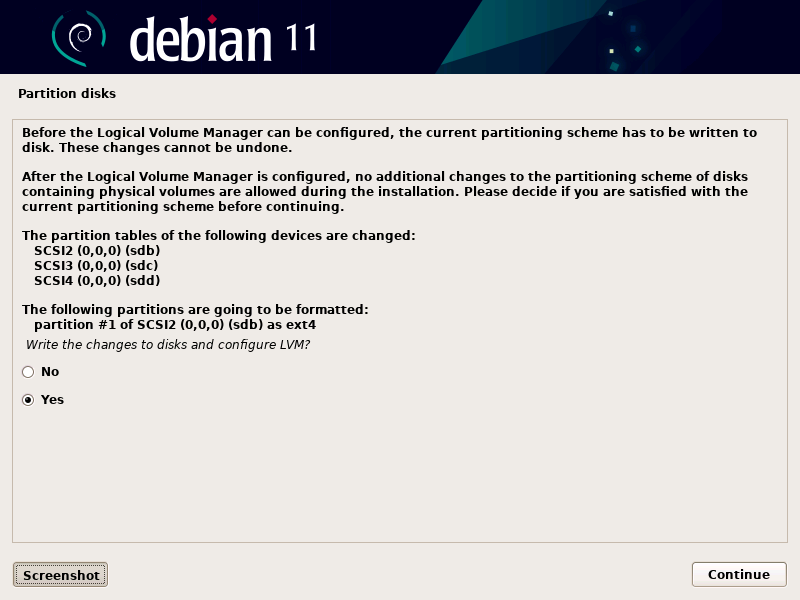
Select Yes and click Continue to Write changes to disks and configure LVM.
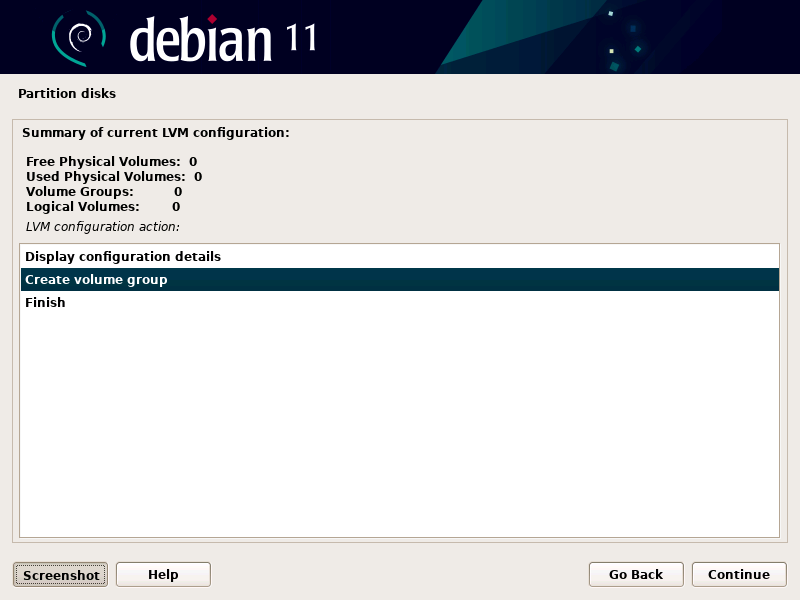
You are now at the Partition disks LVM main menu. You will see a Summary of current LVM configuration and a list of LVM configuration actions. We will create our first volume group by selecting Create volume group and then clicking Continue.
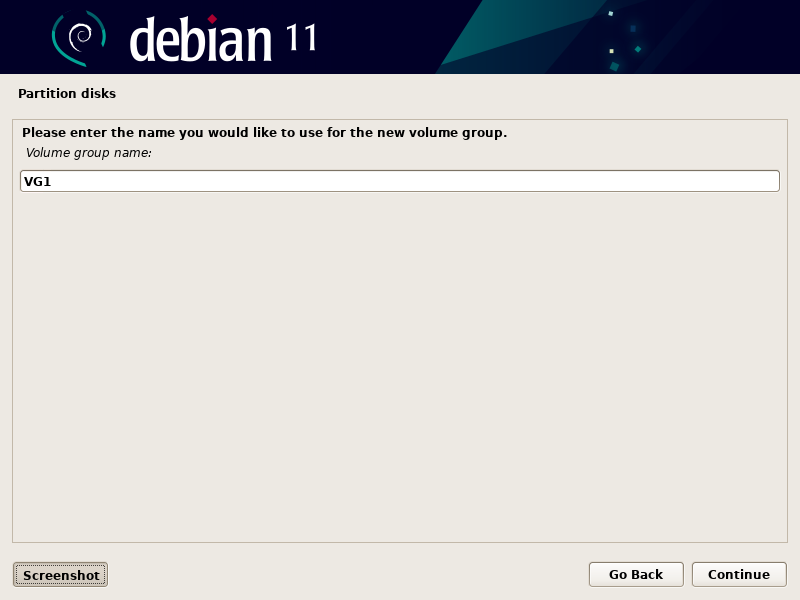
Enter the name you would like to use for the new volume group you are creating then click Continue.
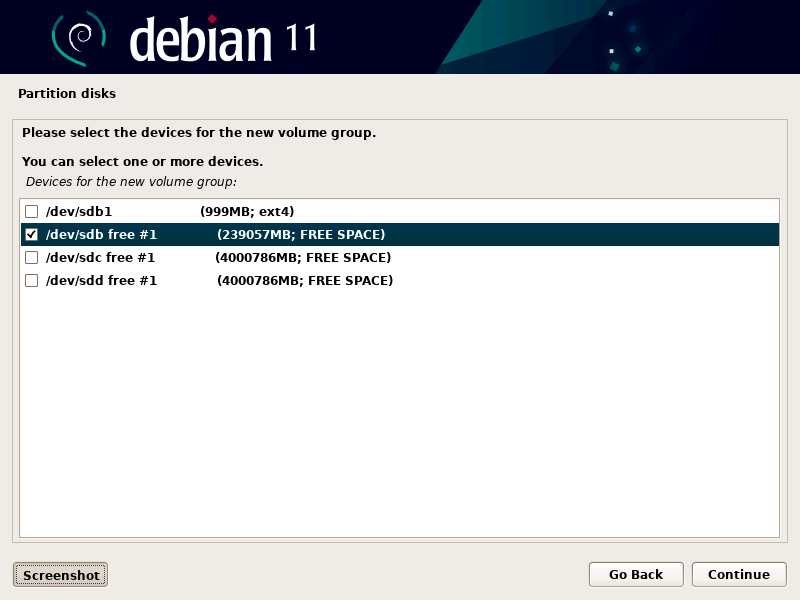
Now you will be ask to select the devices (disks) for the new volume group. Be careful not to select the partition we created in the last step for the boot partition. We will use the remaining ‘FREE SPACE‘ for the SSD drive (sdb). Select it by clicking on the Check Box and then click Continue.
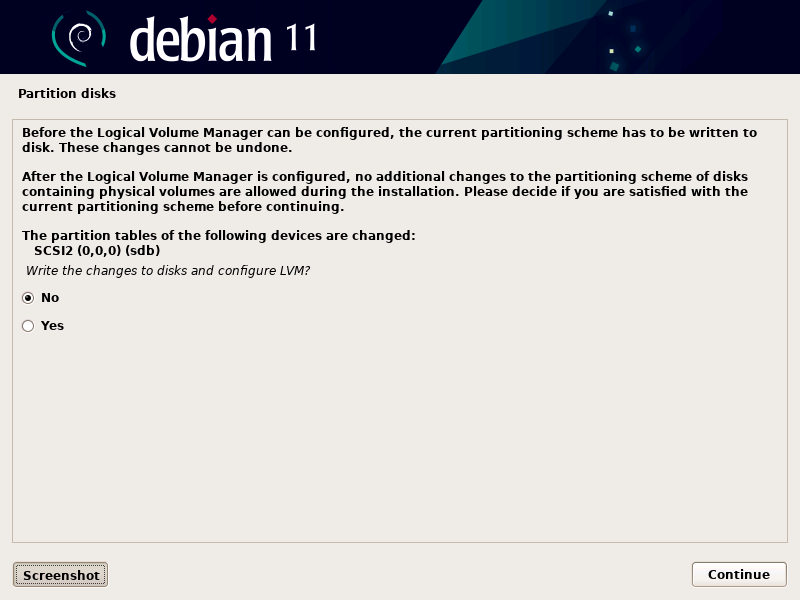
Before we can start to create Logical Volumes with our newly created Volume Group (VG1) we must write the changes to the disk before we can continue. So you don’t accidentally overwrite your disk data the default selection is No.
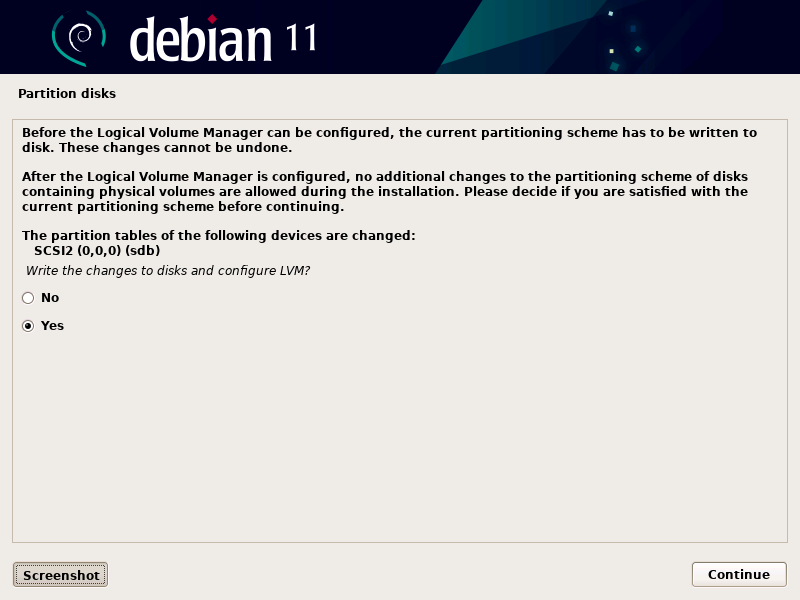
Select Yes to Write the changes to disks and configure LVM, then click Continue.
Create Logical Volumes
Now that the Volume Group has been created and the changes were written to the disks, we will create Logical Volumes. At the Partition disks LVM main menu select Create logical volume and click Continue.
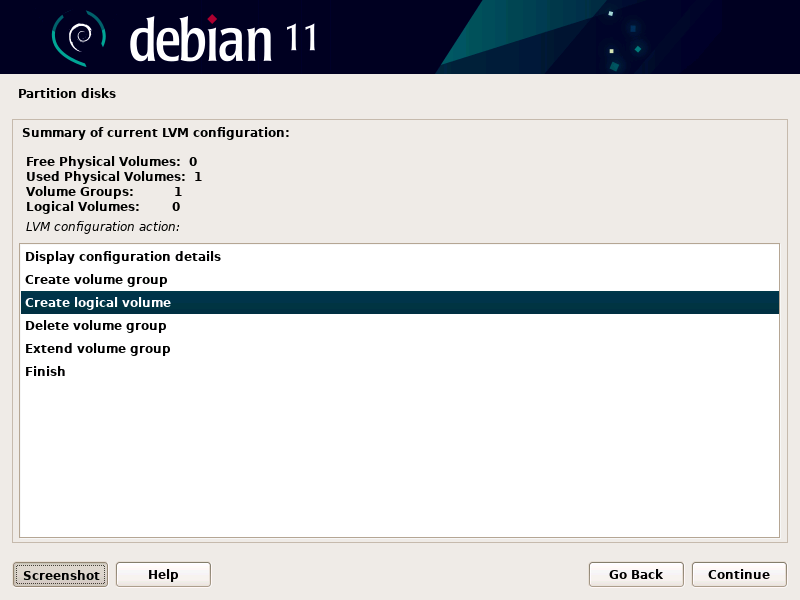
On the next screen you will see the Volume Group you created and the amount of disk space available to use for the Logical Volumes you are going to create. Now select the Volume Group and click Continue.
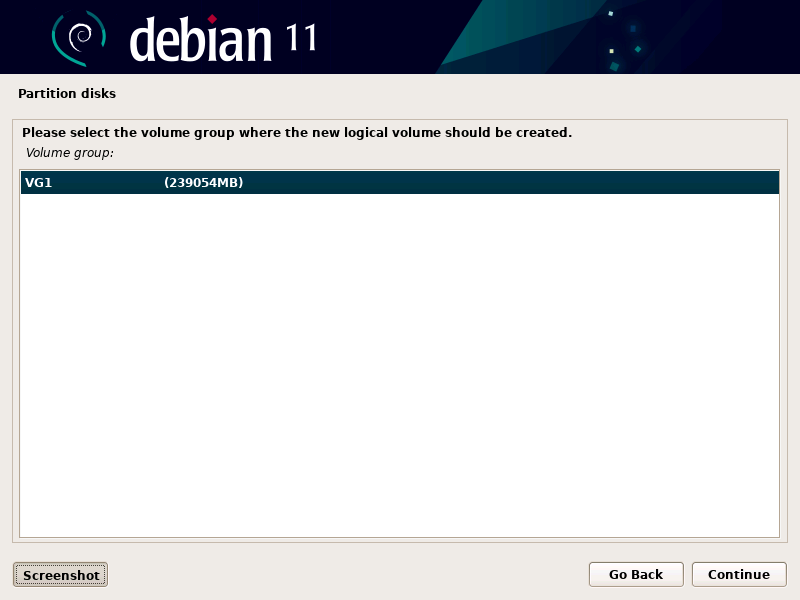
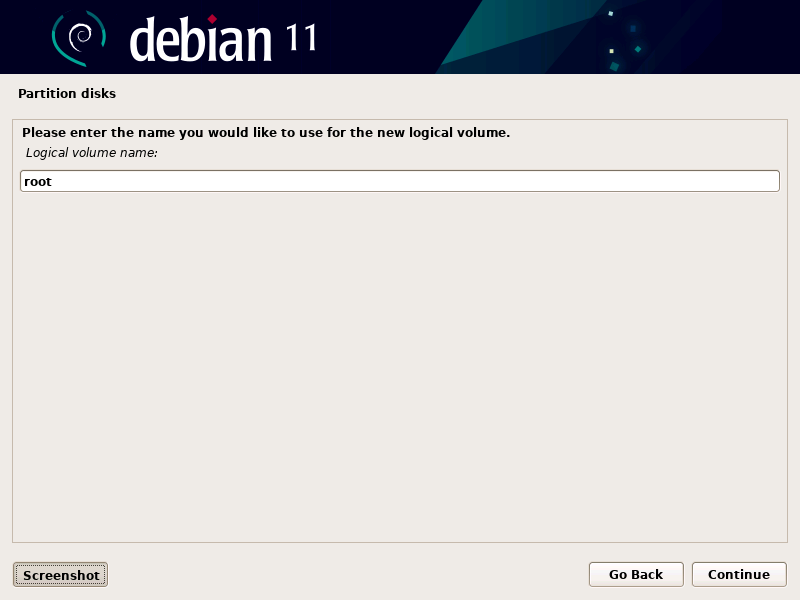
You will be ask to enter the name you would like to use for the new logical volume. I recommend that you use a name that will easily identify what the logical volume will be used for. We are going to create our first logical volume for the ‘/‘ (root) directory so type ‘root‘ for the Logical volume name and click Continue.
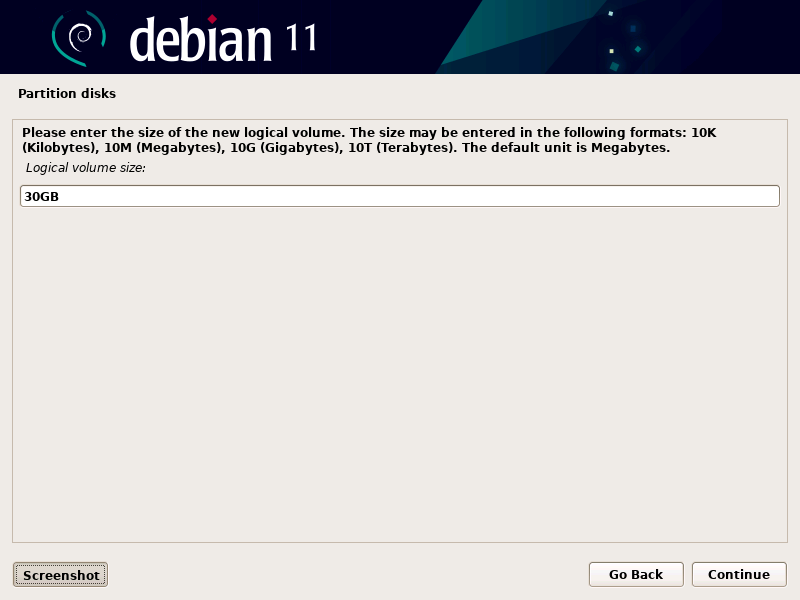
You will now be ask to enter the size of the new logical volume. The amount of available disk space is automatically displayed. You can enter any amount using the following formats: 10K (Kilobytes), 10M (Megabytes), 10G (Gigabytes), or 10T (terabytes). If you just use a number Megabytes is the default.
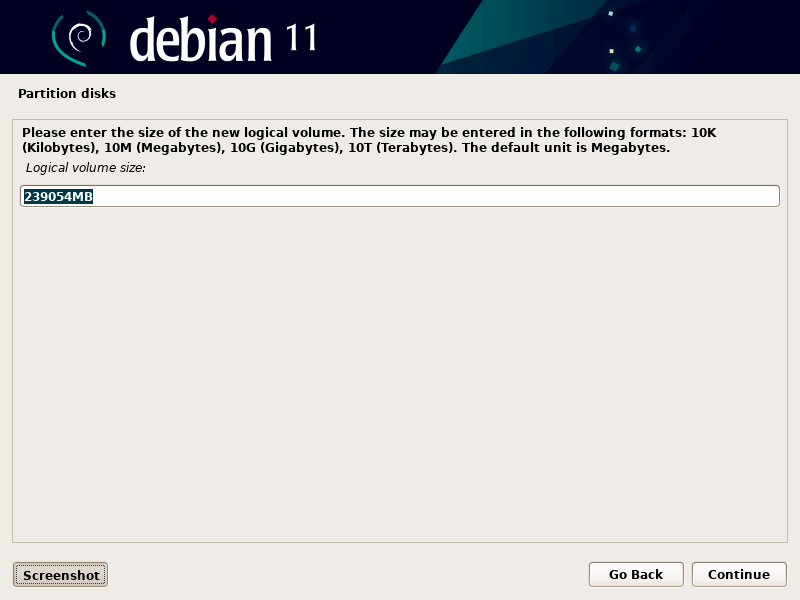
I set the ‘/‘ (root) partition size to 30GB for my computer, depending upon the computer’s application 15G–64G is the recommended size. Enter the size of your ‘/‘ (root) partition and click Continue.
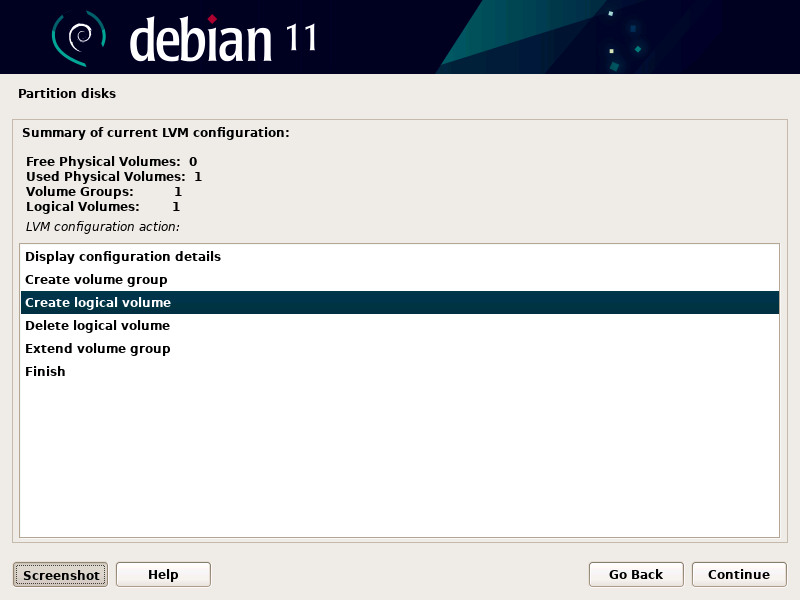
You will return back to the Partition disks LVM main menu, select Create logical volume and click Continue to create another logical volume for the ‘/tmp‘ directory.
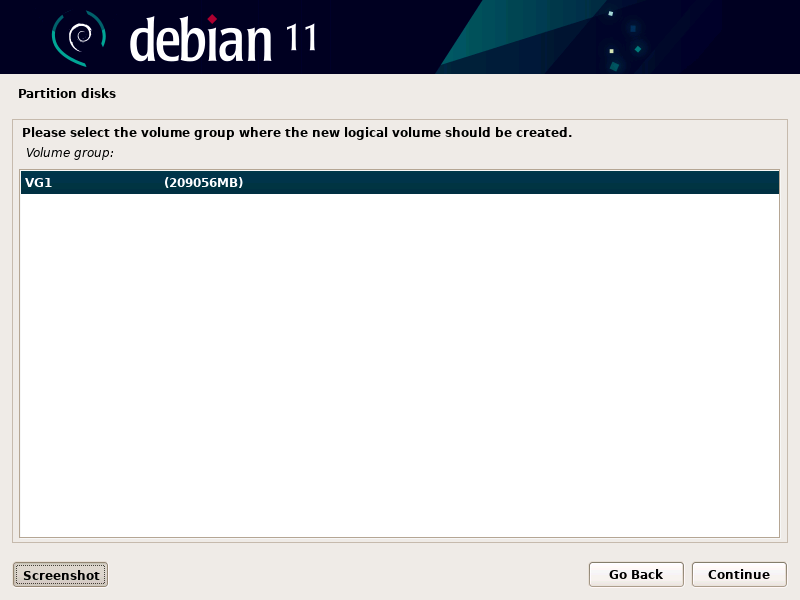
Select the Volume Group and click Continue.
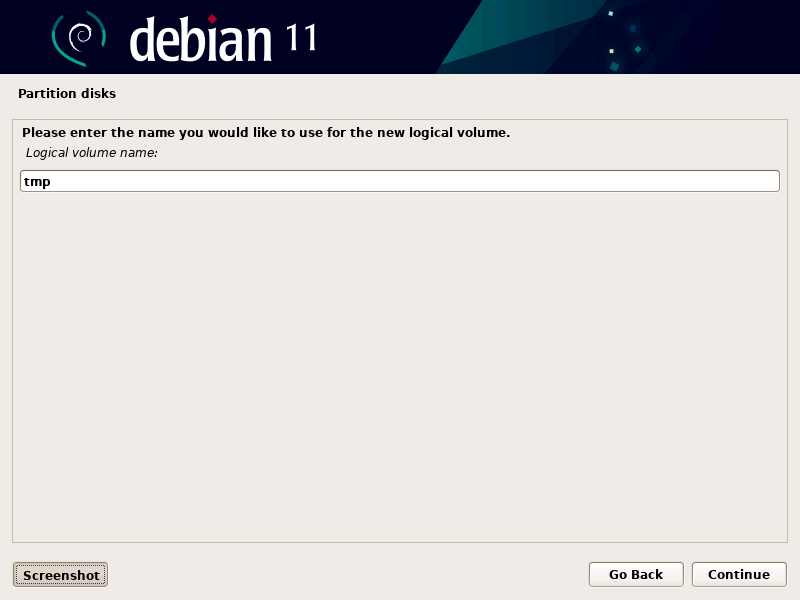
Now we are going to create a partition for the ‘/tmp‘ directory. We will name the logical volume tmp and click Continue.
I set my logical volume size for the ‘/tmp‘ directory for 8GB. This should be plenty of memory for a temp directory, minimum suggested sized is 50MB. Enter the amount of storage you want to use for your ‘/tmp‘ partition and click Continue.
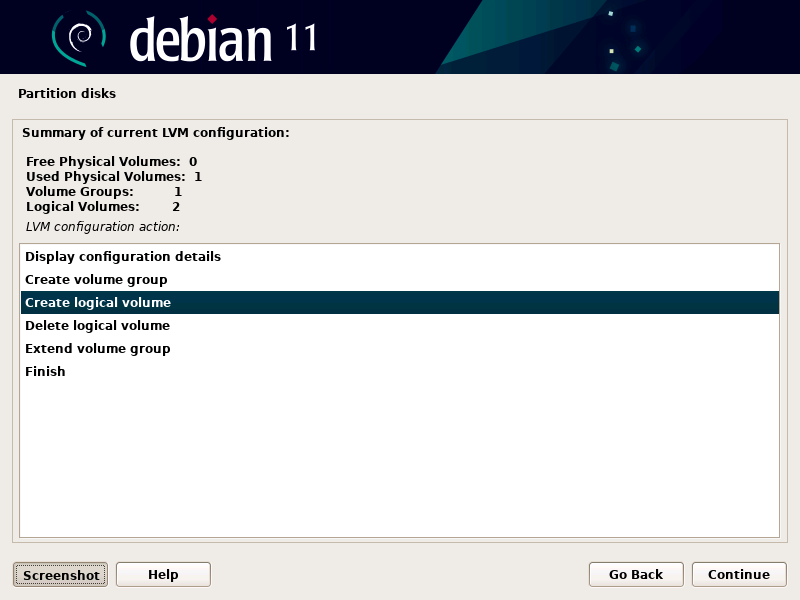
You will return to the Partition disks LVM main menu, select Create logical volume and click Continue to create another logical volume for the ‘/swap‘ directory.
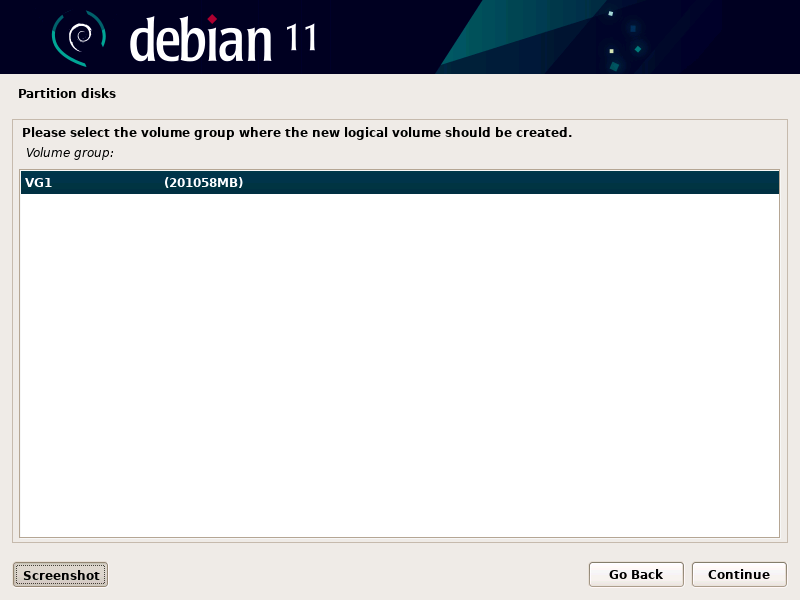
Select the Volume Group and click Continue.
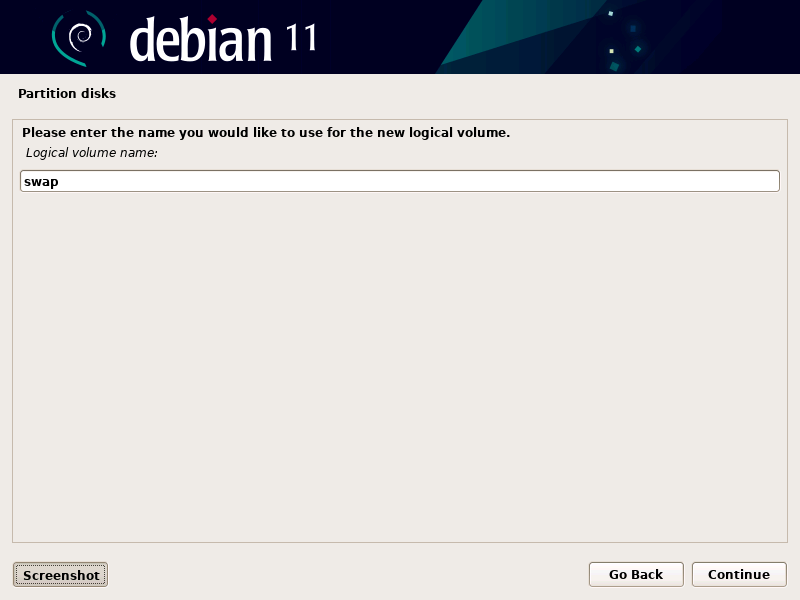
Now we are going to create a partition for the ‘/swap‘ directory. We will name the logical volume swap and click Continue.
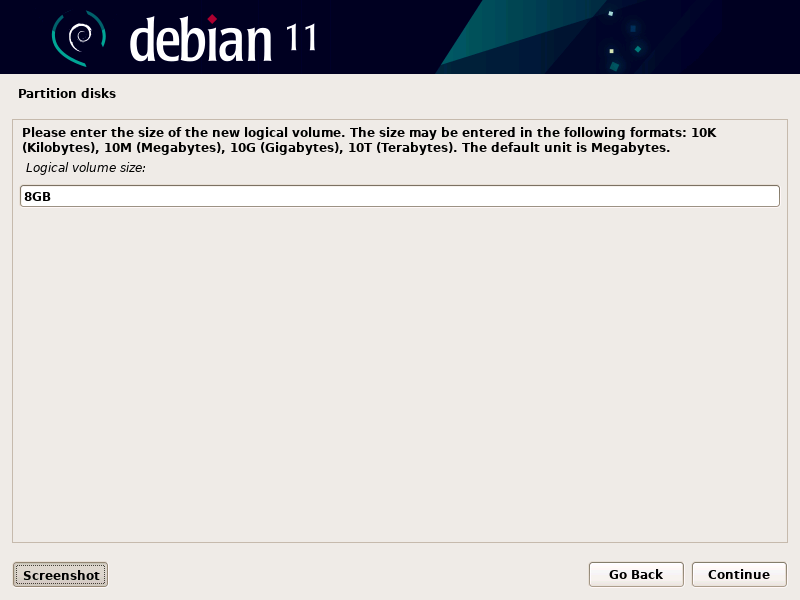
The size of the ‘/swap‘ partition will depend upon the amount of RAM in your computer. My computer has 8GB of RAM so I added 2GB to set the volume size to 10GB. Enter the size of the ‘/swap‘ partition for your computer and click Continue.
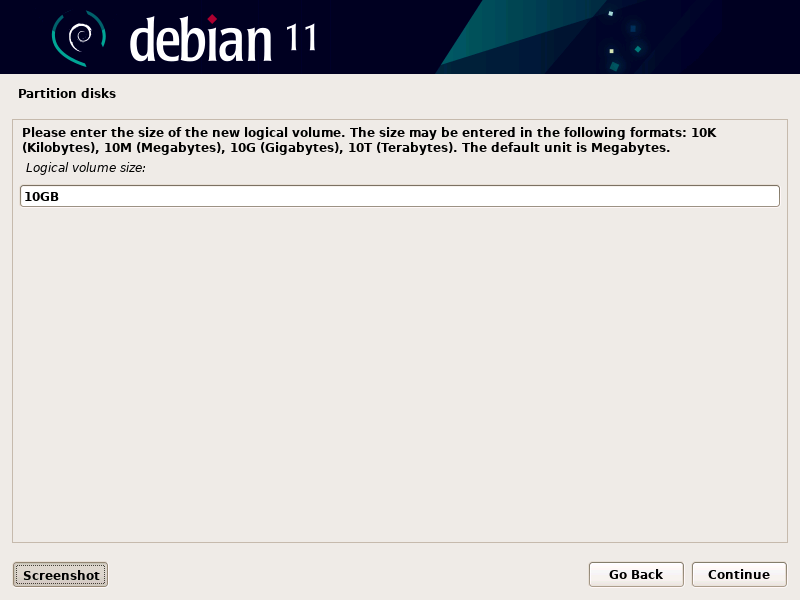
You will return to the Partition disks LVM main menu. Select Create logical volume and click Continue to create a Logical Volume for the ‘/home‘ directory.

Select the Volume Group and click Continue.
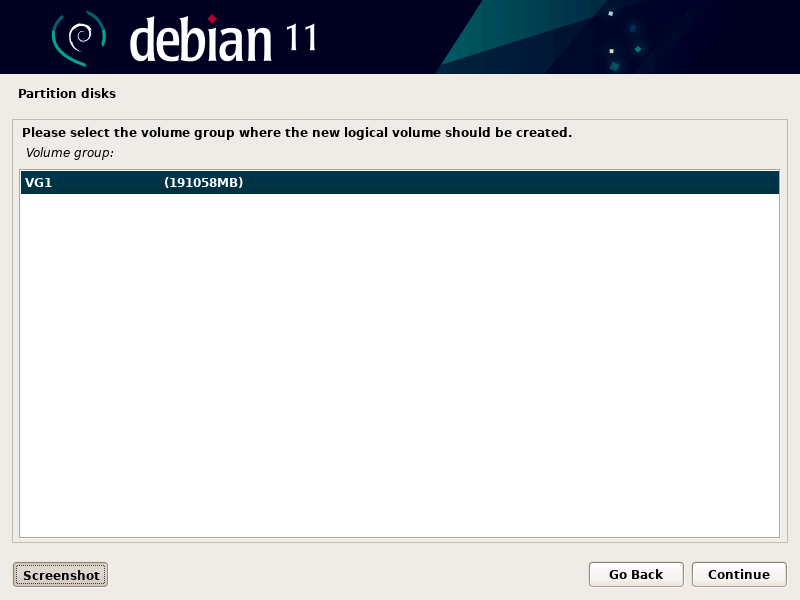
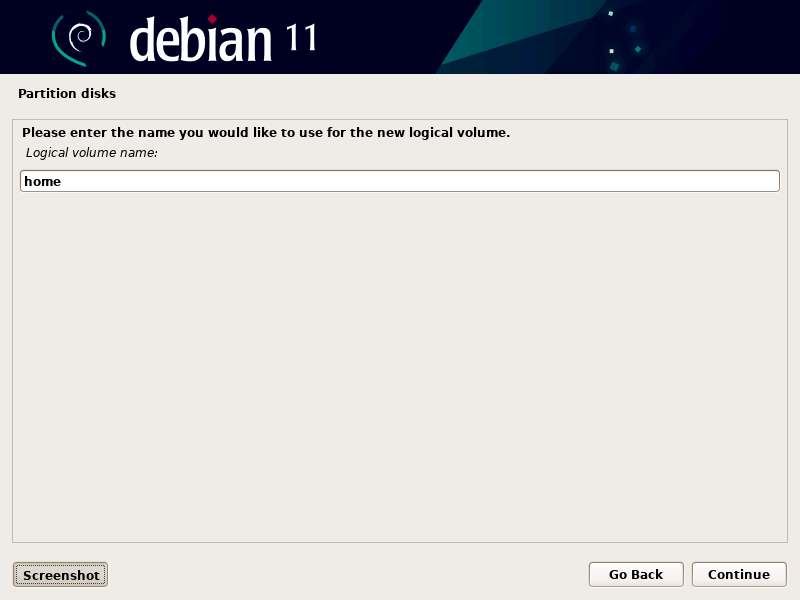
Now we are going to create a partition for the ‘/home‘ directory. We will name the logical volume home and click Continue.
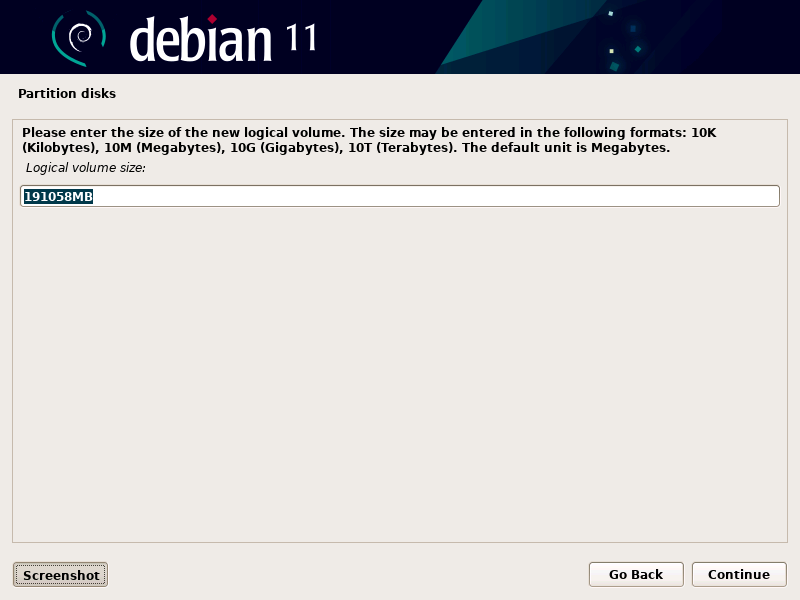
We are going to assign all of the remaining space left to the ‘/home‘ partition. Unless you want to reserve some space for future adjustments to your logical volumes, simply click Continue to accept the logical volume displayed.
Create Another Volume Group
You will return to the Partition disks LVM main menu. Now I am going to create a second Volume Group with the remaining two 4TB disks in my computer. Select Create volume group and then click Continue.
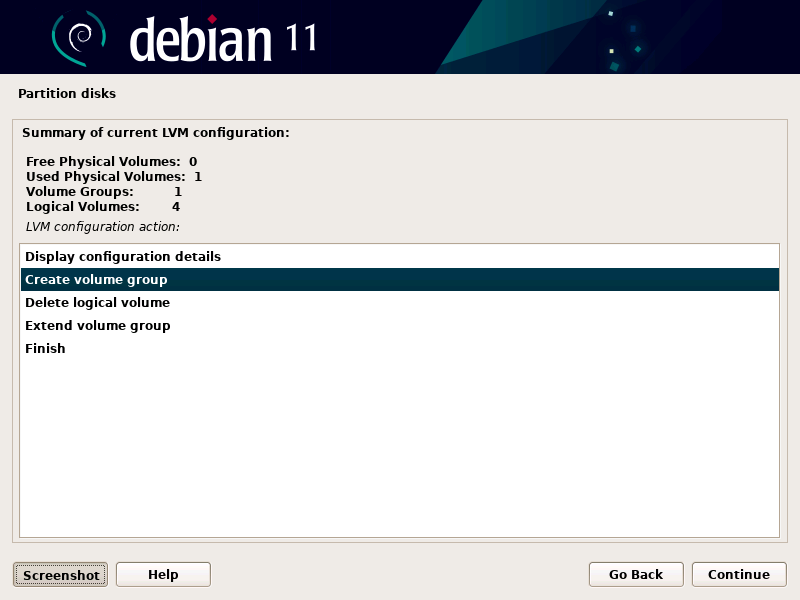
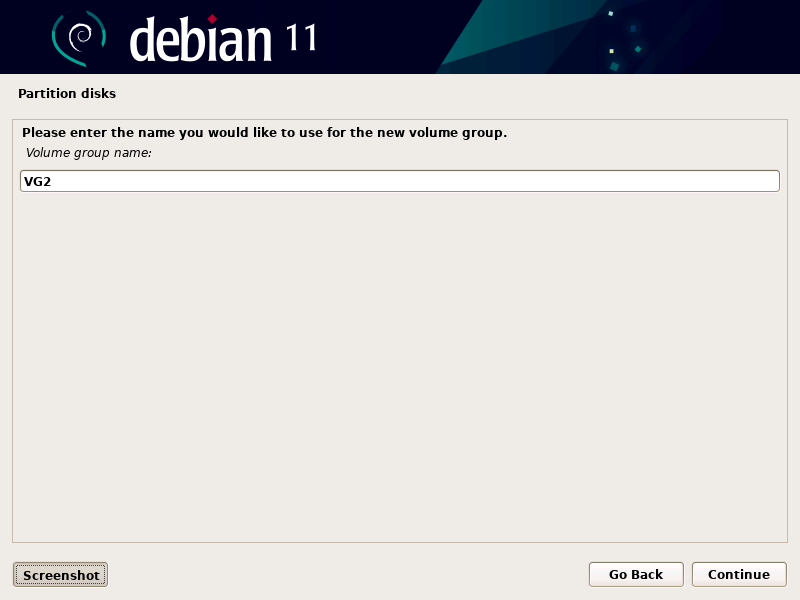
Enter the name you would like to use for the new volume group. Enter your Volume group name (VG2) and click Continue.
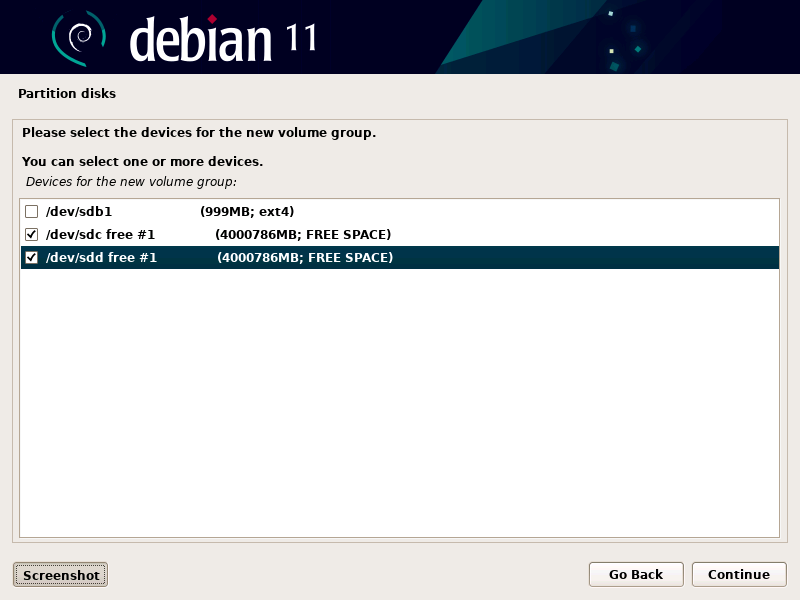
Now you will be ask to select the devices (disks) for the new Volume Group. Be careful not to select the partition we created in the for the boot partition. We will use the remaining ‘FREE SPACE‘ for remaining drives (sdc and sbd). Select both of them by clicking on the Check Boxes and then click Continue.
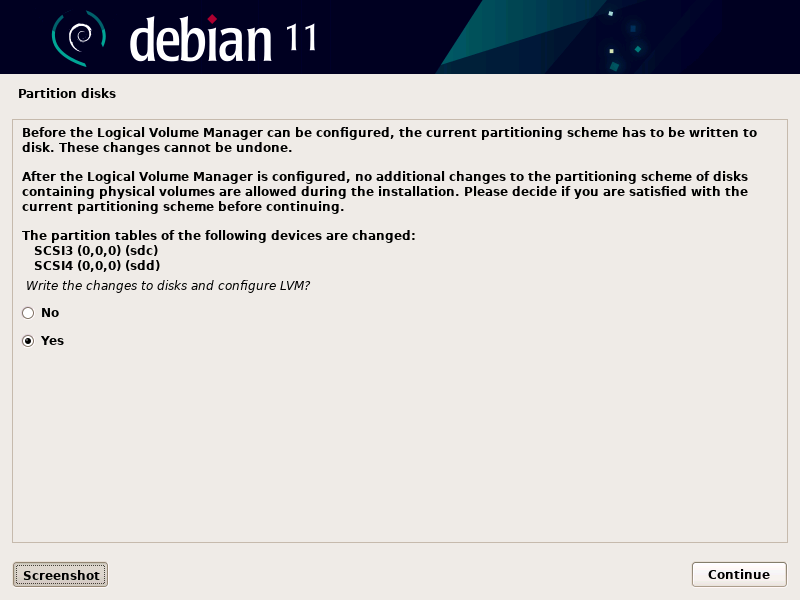
Once again we must write these changes to disk before we can start to create Logical Volumes with our newly created Volume Group. So you don’t accidentally overwrite your disk data the default selection is No.
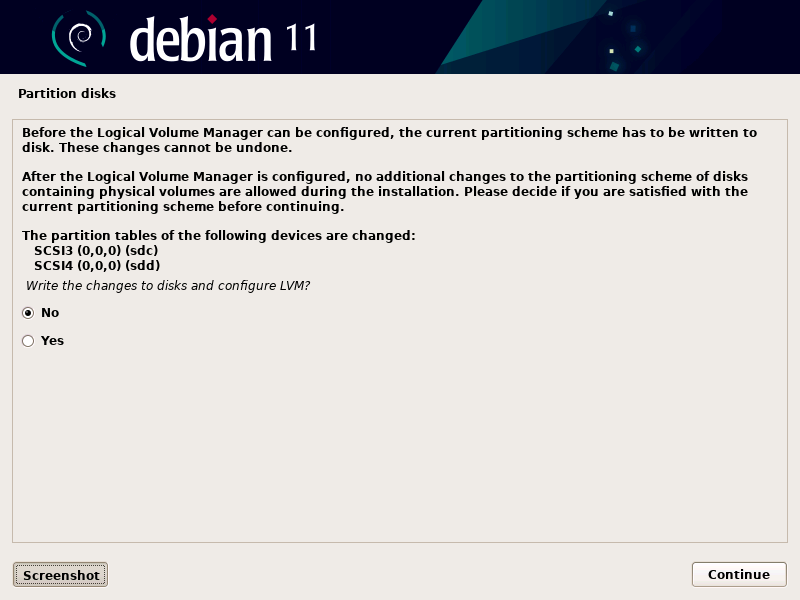
Select Yes to Write the changes to disks and configure LVM, then click Continue.
Create Another Logical Volume
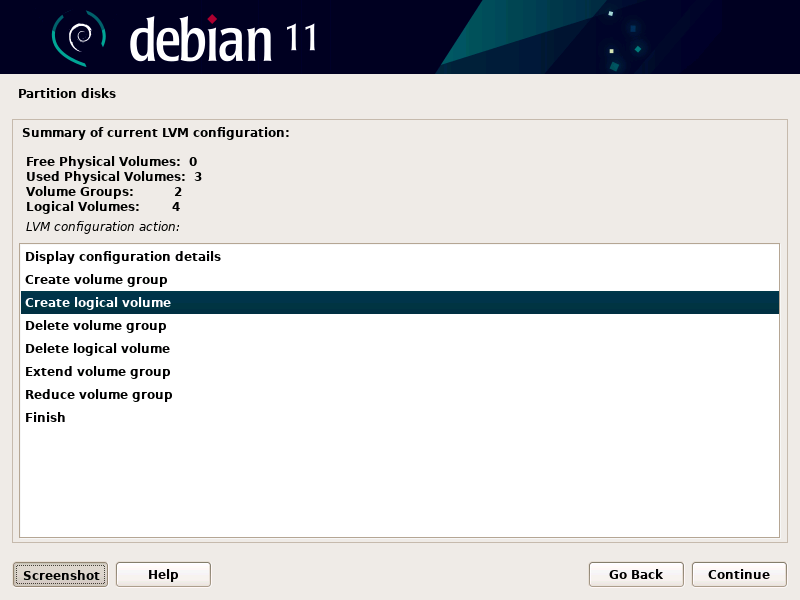
We will now create the final partition for the ‘/var’ directory. The ‘/var’ directory is where most of the data for a web server, file server, media server, data server, mail server, etc. is stored. This is the reason I designated 8TB to be used in this Volume Group. Select Create logical volume and click Continue.
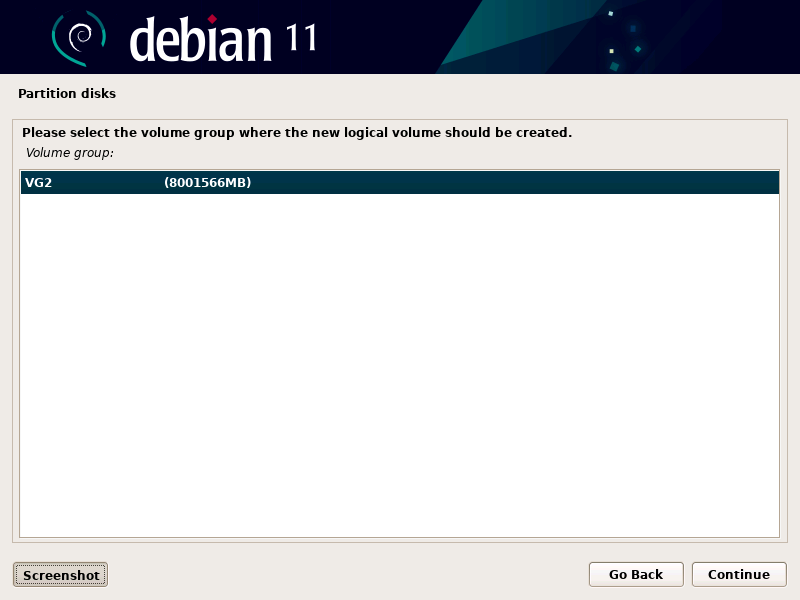
Select the Volume Group and click Continue.
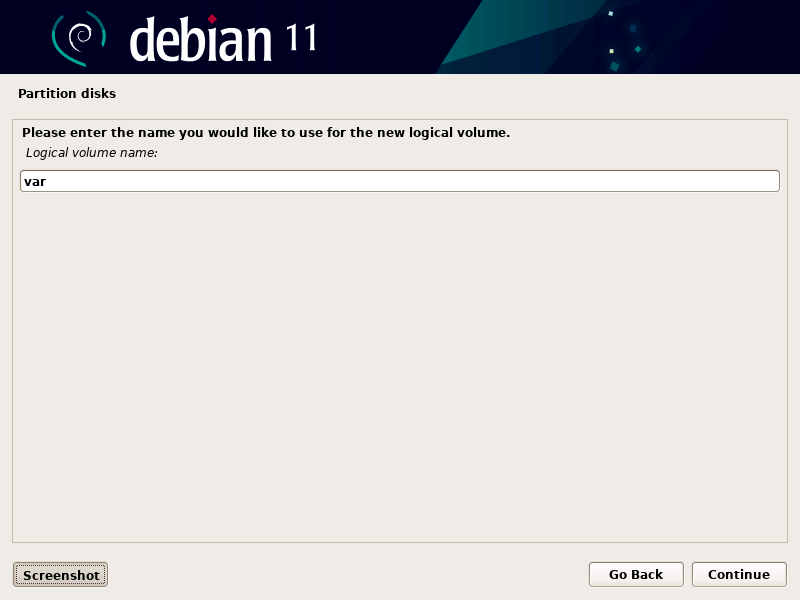
Now we are going to create a partition for the ‘/var‘ directory. We will name the logical volume var and click Continue.
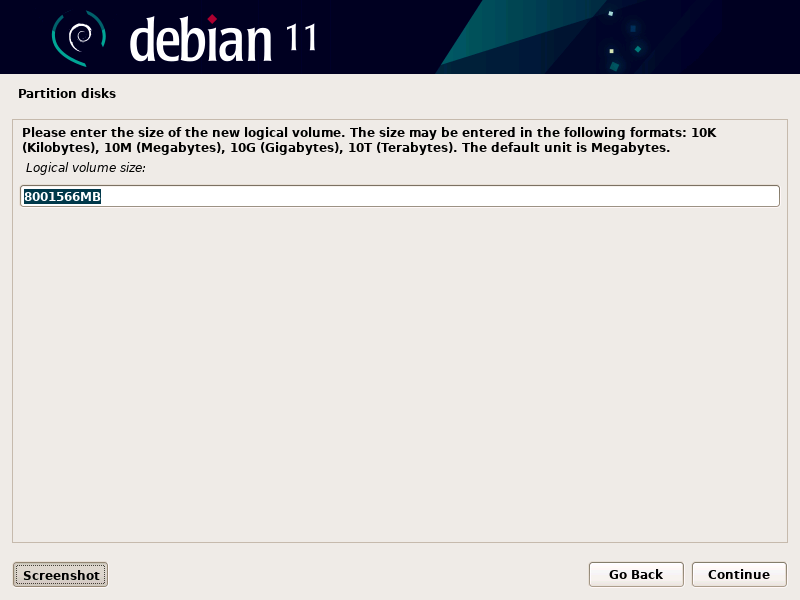
We are going to assign all of the space to the ‘/var‘ partition. Unless you want to reserve some space for future logical volumes, simply click Continue to accept the logical volume displayed.
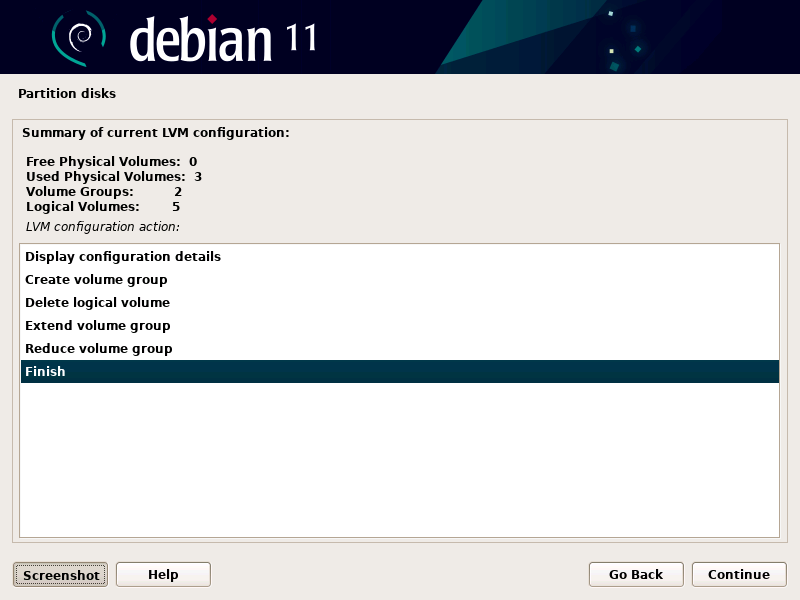
We are now done creating the logical volume partitions for the ‘/‘ (root), ‘/tmp‘, ‘/home‘, ‘/swap‘ and ‘/var‘ directories. In the summary you can see we used all three drives, created two volume groups and five logical volumes. Select Finish and then click Continue.
Mount The Logical Volumes
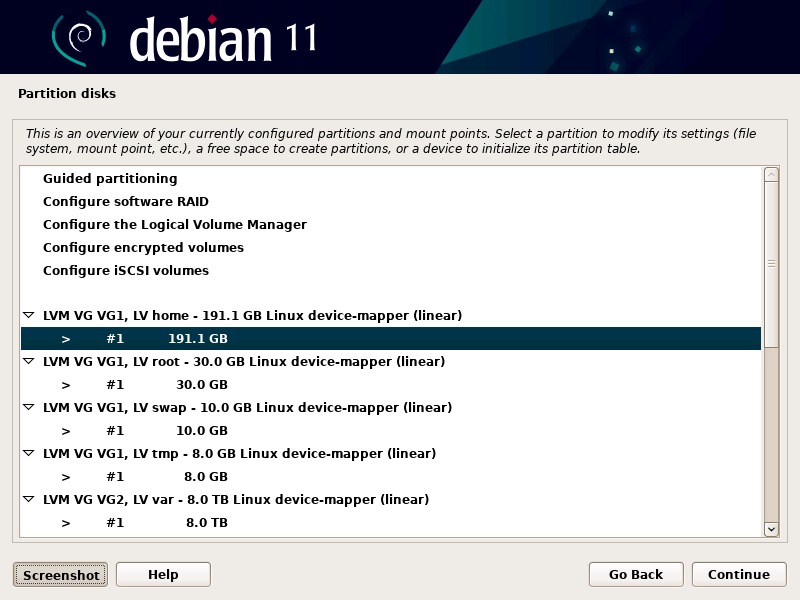
You will return to the Partition disks main menu. Now we must mount the logical volumes we created to their file system directories. We will start with the Logical Volume we named home. Highlight the line showing the size of the home logical volume and click Continue.
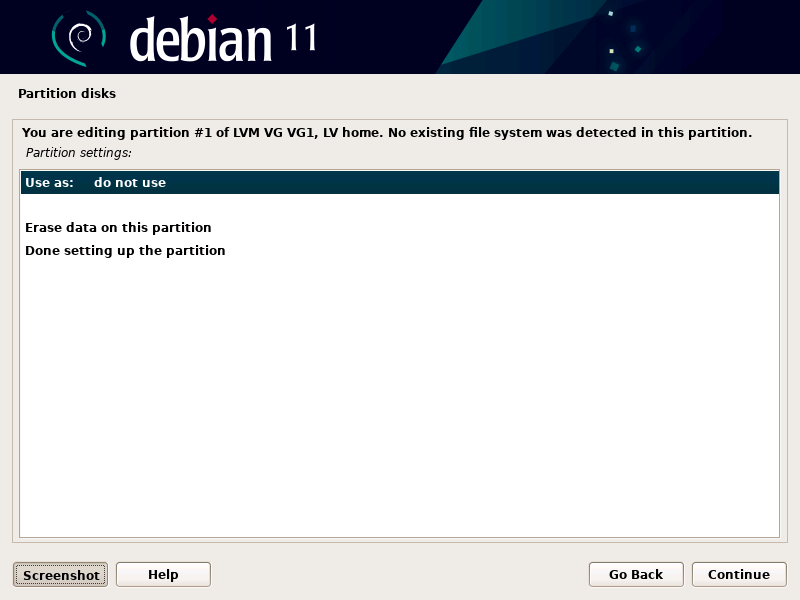
You are now at the Partition settings screen. First we must set the type of file system the partition will use. Highlight the ‘Use as: do not use’ line and click Continue.
Next you will need to select the type of file system you want to use for your partition. Here is a brief description of each of the selections:
Ext4(default filesystem in Debian) Fourth Extended Filesystem with extentsExt3Second Extended Filesystem with journaling extensionsExt2Second Extended FilesystembtrfsB-Tree filesystemJFSThe Journaled Filesystem (JFS)XFSSGI XFS FilesystemFAT16MS & DR DOS FAT 16 bit filesystemFAT32MS & DR DOS FAT 32 bit filesystemsawp areaSwap area for RAM memory
I recommend that you use Ext4 for all of your partitions except for the swap partition which can only use the swap area format. Select the file system type and then click Continue.
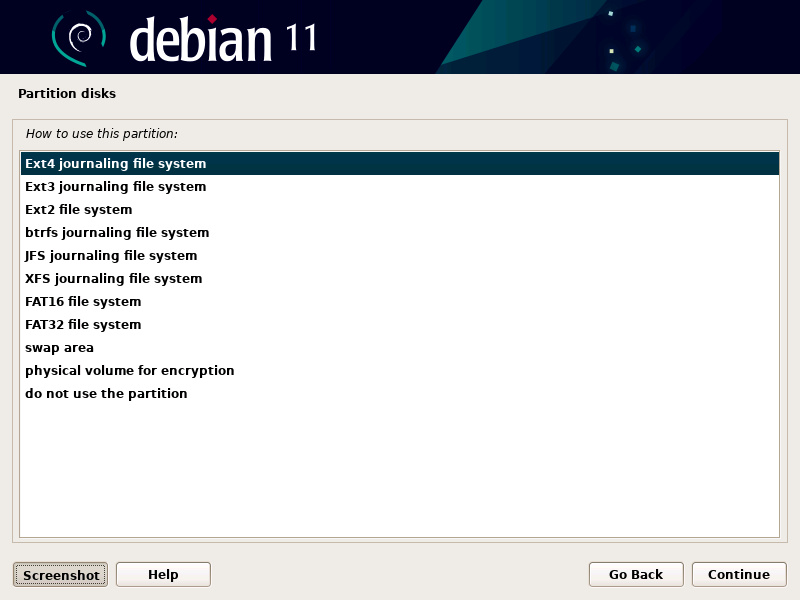
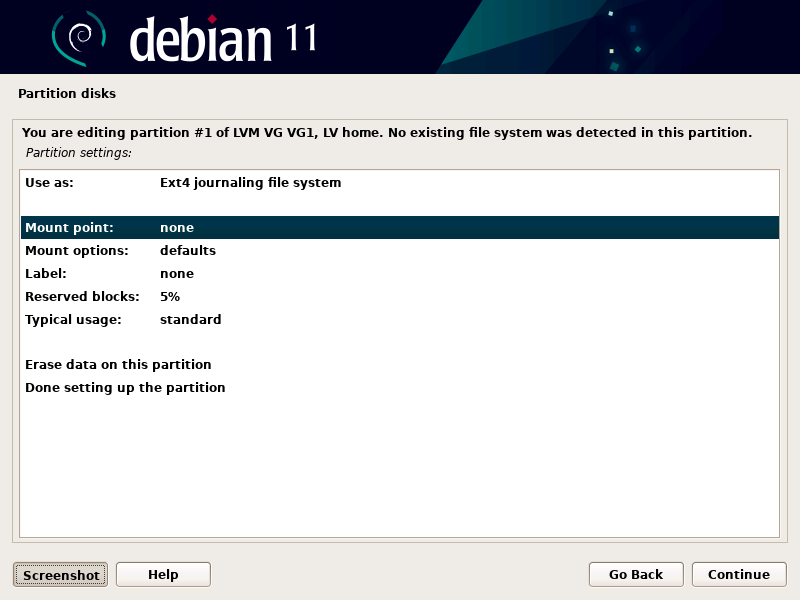
Now we must set the Mount point in the file system for the Logical Volume partitions. Highlight Mount point and click Continue.
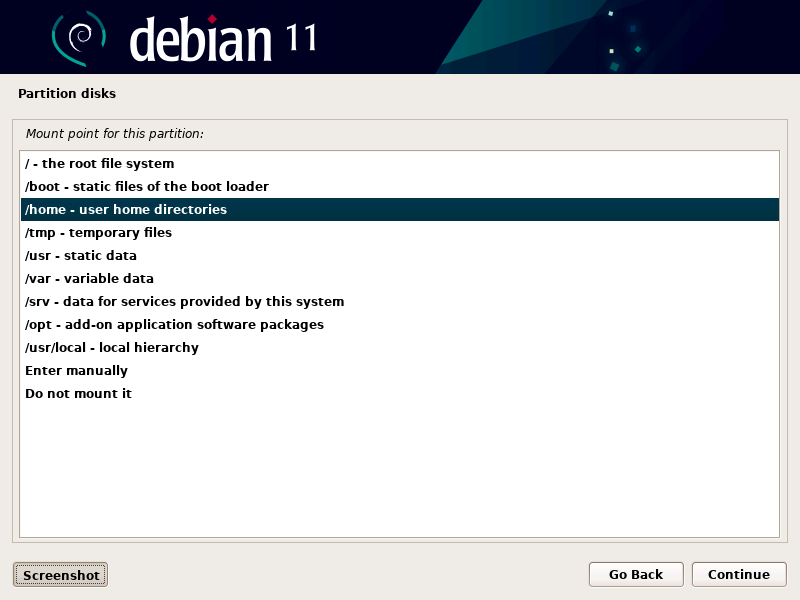
Select the ‘/home‘ Mount point for this partition and then click Continue.
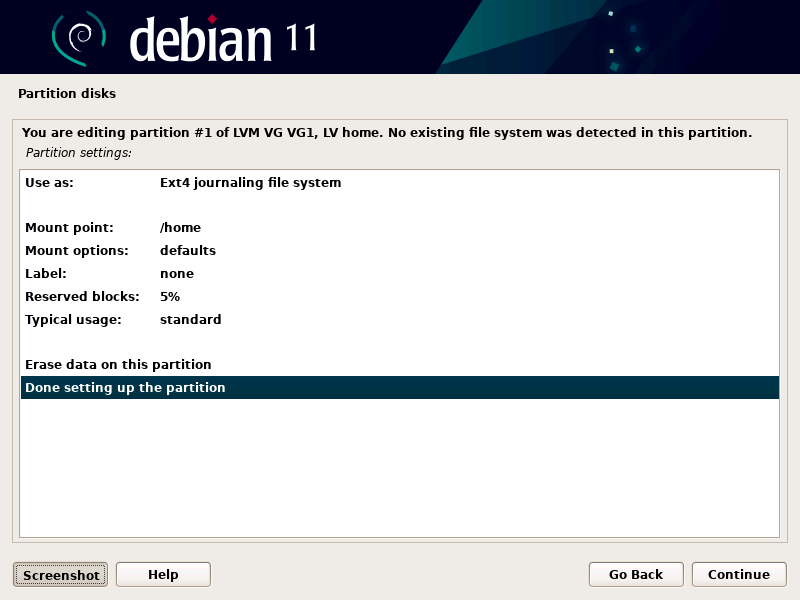
We are done configuring the partition, select Done setting up the partition and click Continue.
You will return to the Partition disks main menu. Now we must mount the Logical Volume we named root. Highlight the line showing the size of the root logical volume and click Continue.
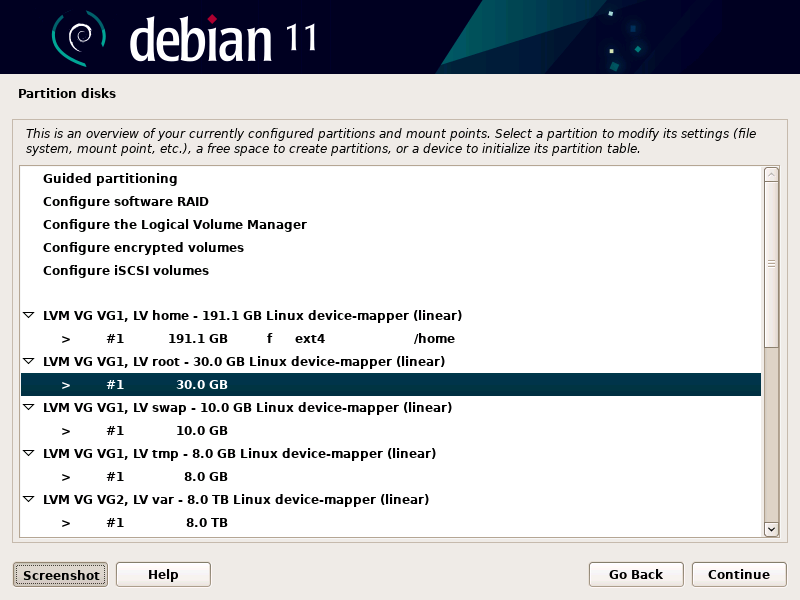
You are now at the Partition settings screen. First we must set the type of file system the partition will use. Highlight the ‘Use as: do not use’ line and click Continue.
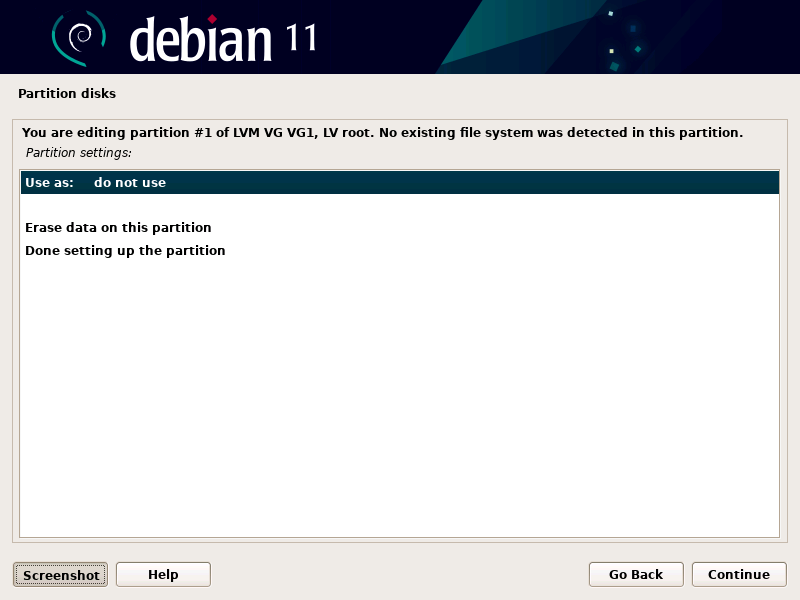
I recommend that you use Ext4 for all of your partitions except for the swap directory which can only use the swap area format. Select the file system type and then click Continue.
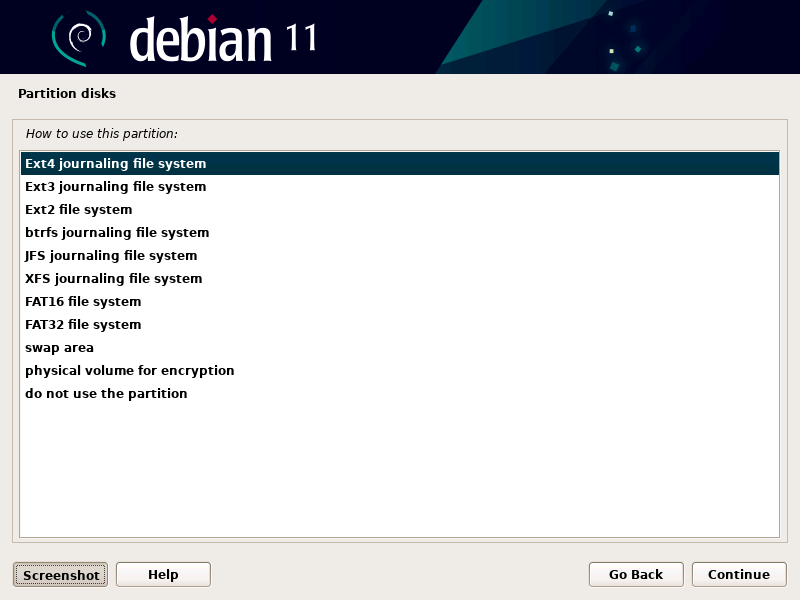
Now we must set the Mount point in the file system for the Logical Volume partition. Highlight Mount point and click Continue.
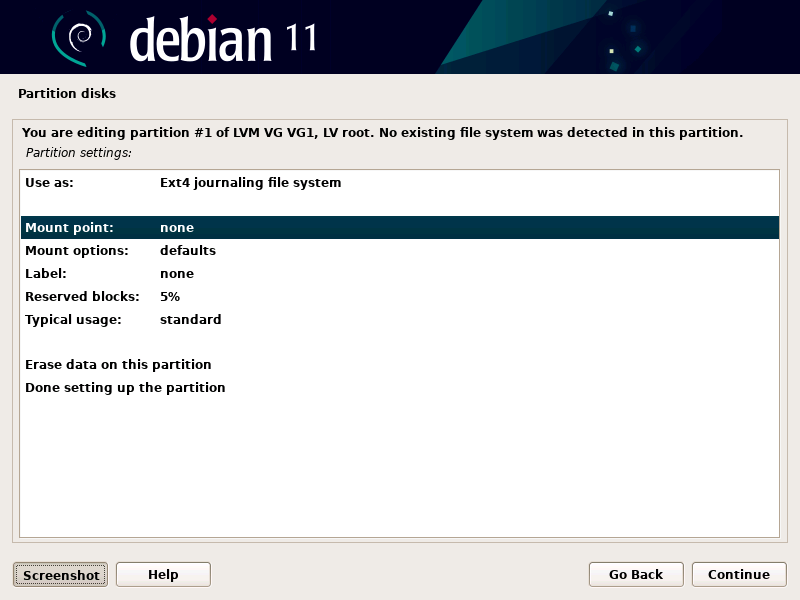
Select the ‘/‘ (root) Mount point for this partition and then click Continue.
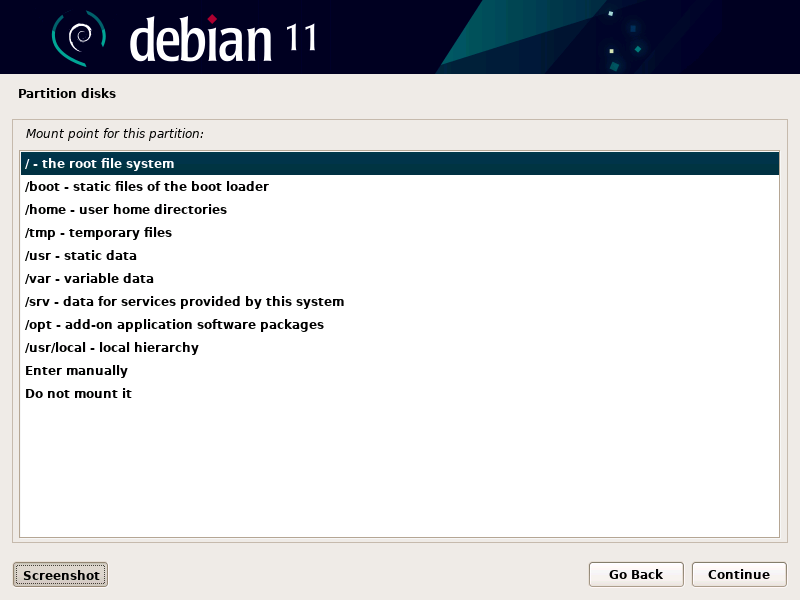
We are done configuring the partition, select Done setting up the partition and click Continue.
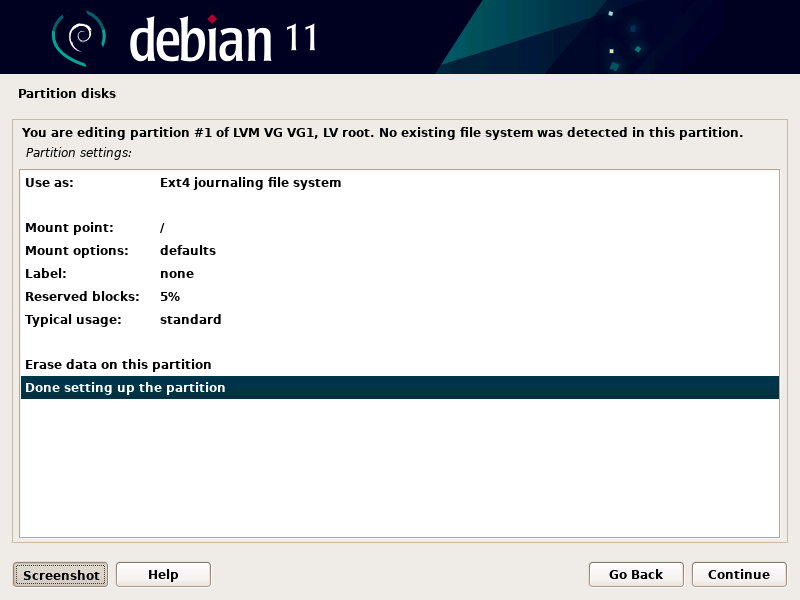
You will return to the Partition disks main menu. Now we must mount the Logical Volume we named swap. Highlight the line showing the size of the swap logical volume and click Continue.
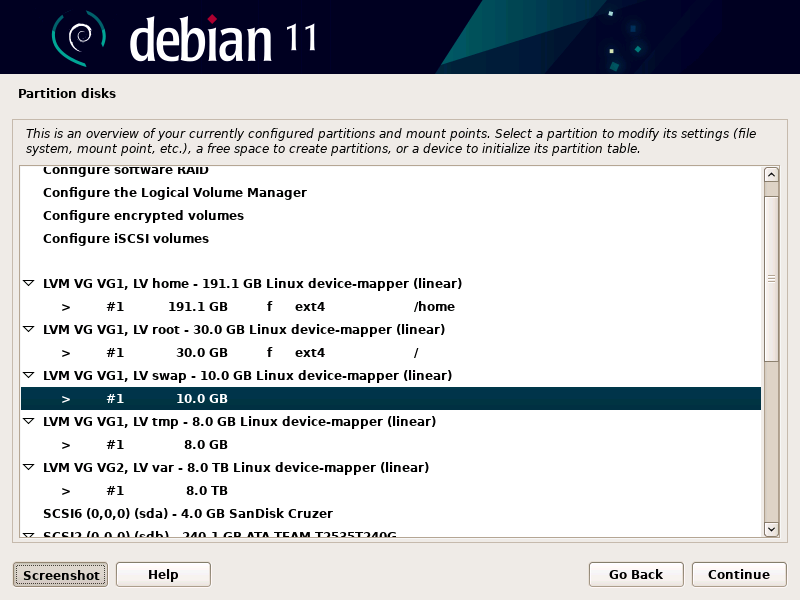
You are now at the Partition settings screen. First we must set the type of file system the partition will use. Highlight the ‘Use as: do not use’ line and click Continue.
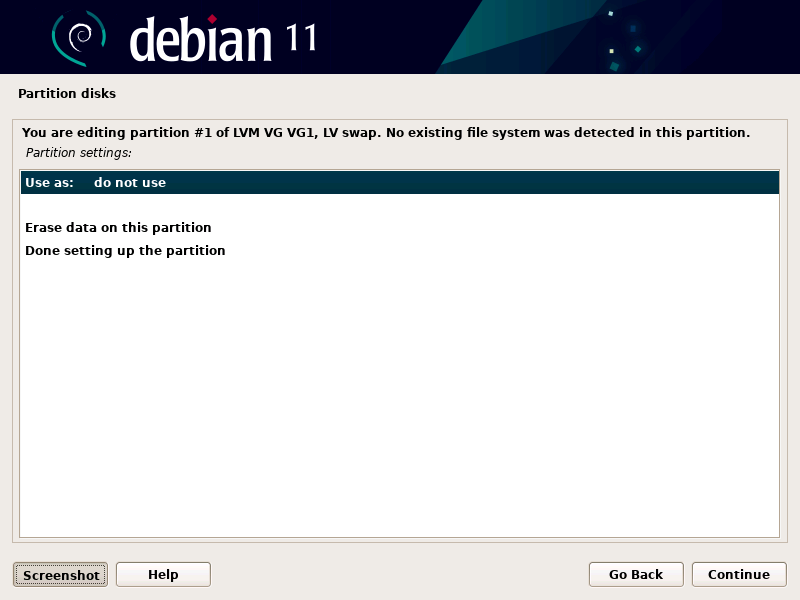
You must use swap area format for the swap directory. Select the file system type and then click Continue.
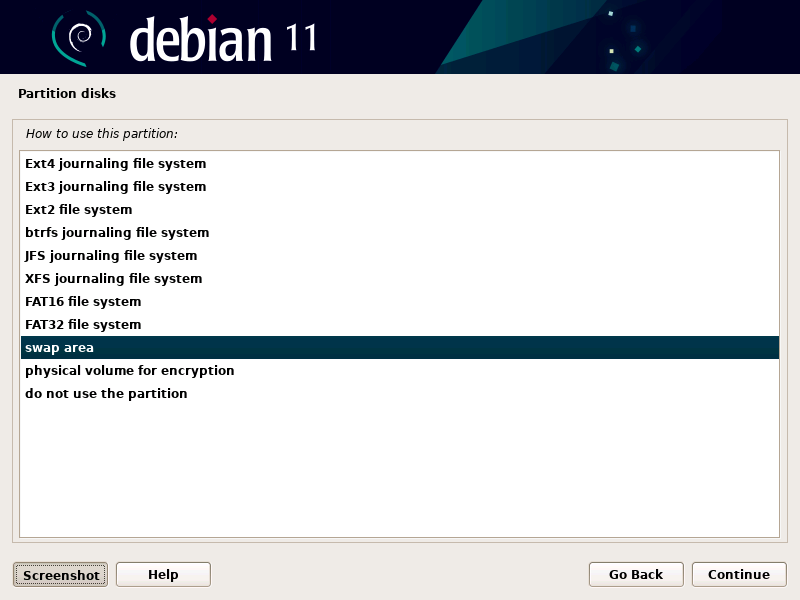
We are done configuring the partition, select Done setting up the partition and click Continue.
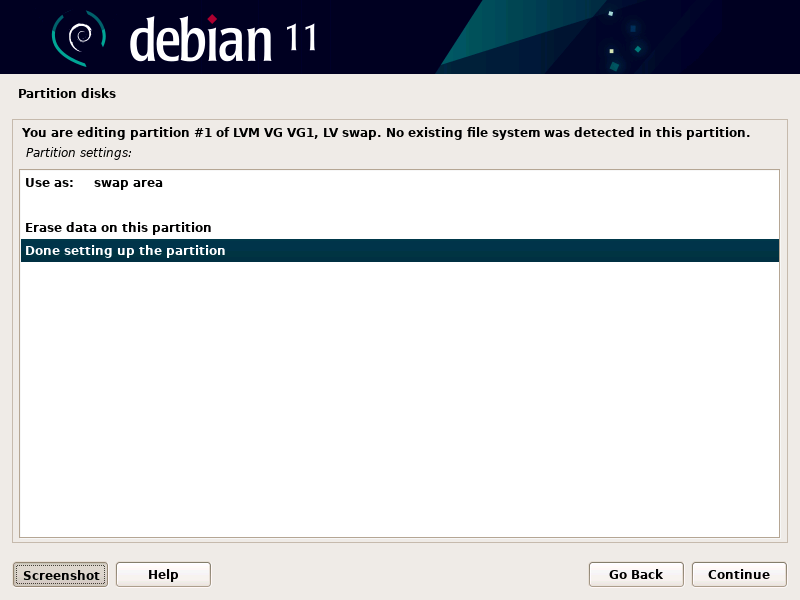
You will return to the Partition disks main menu. Now we must mount the Logical Volume we named tmp. Highlight the line showing the size of the tmp logical volume and click Continue.
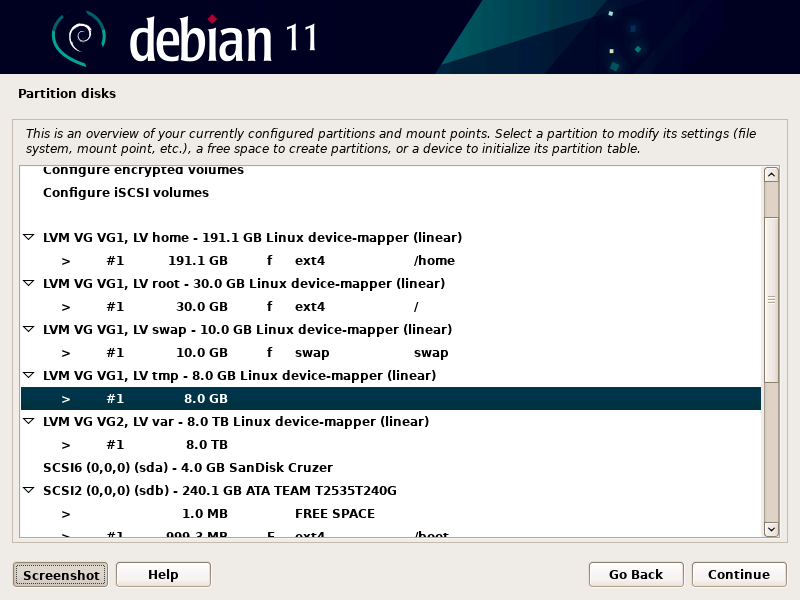
You are now at the Partition settings screen. First we must set the type of file system the partition will use. Highlight the ‘Use as: do not use’ line and click Continue.
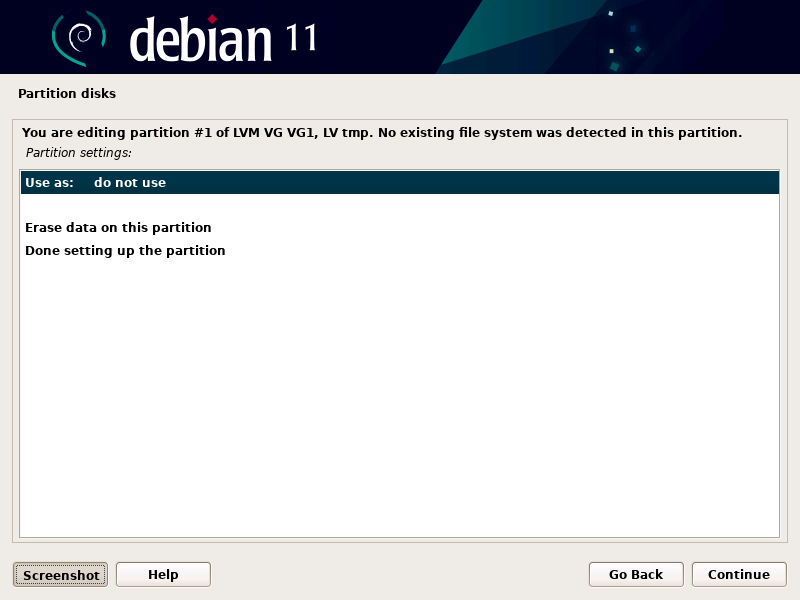
I recommend that you use Ext4 for all of your partitions except for the swap directory which can only use the swap area format. Select the file system type and then click Continue.
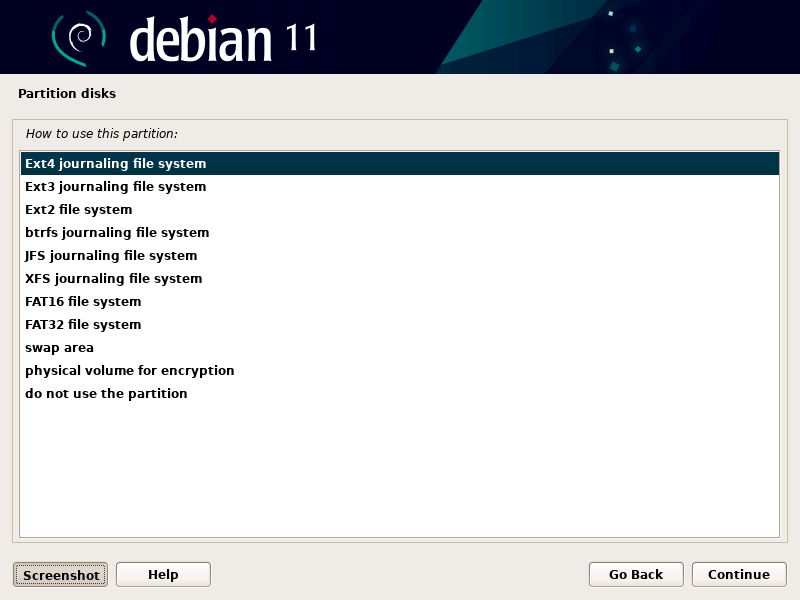
Now we must set the Mount point in the file system for the Logical Volume partition. Highlight Mount point and click Continue.
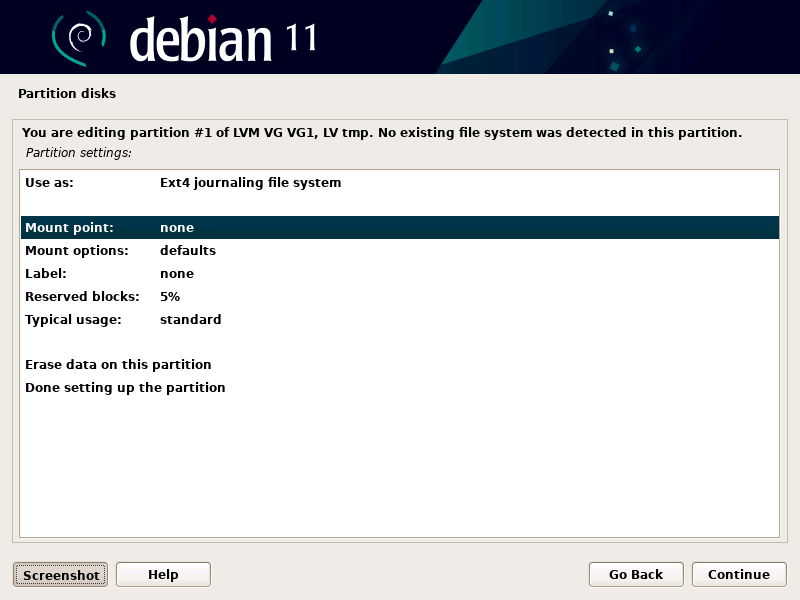
Select the ‘/tmp‘ Mount point for this partition and then click Continue.
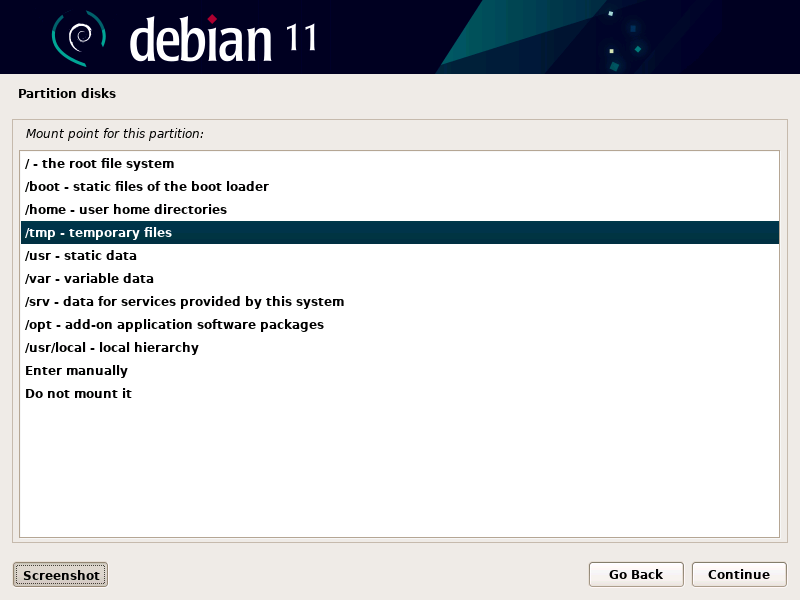
We are done configuring the partition, select Done setting up the partition and click Continue.
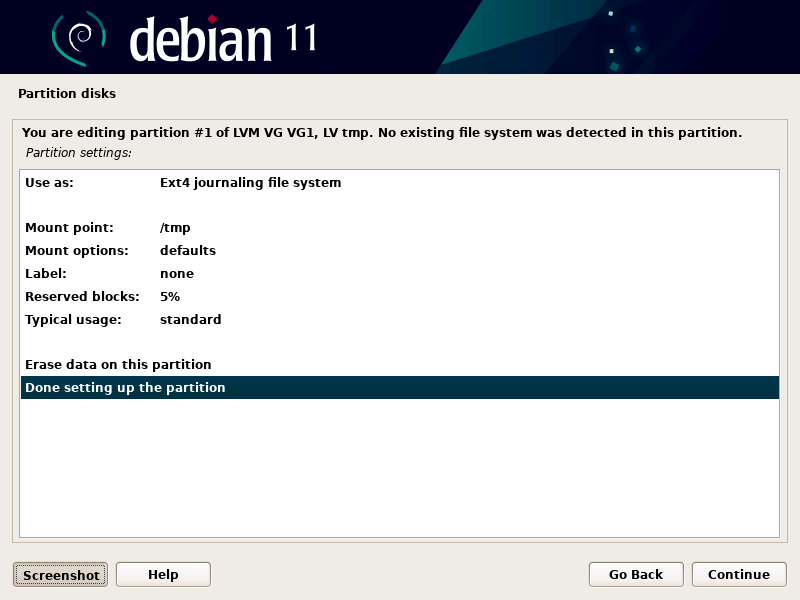
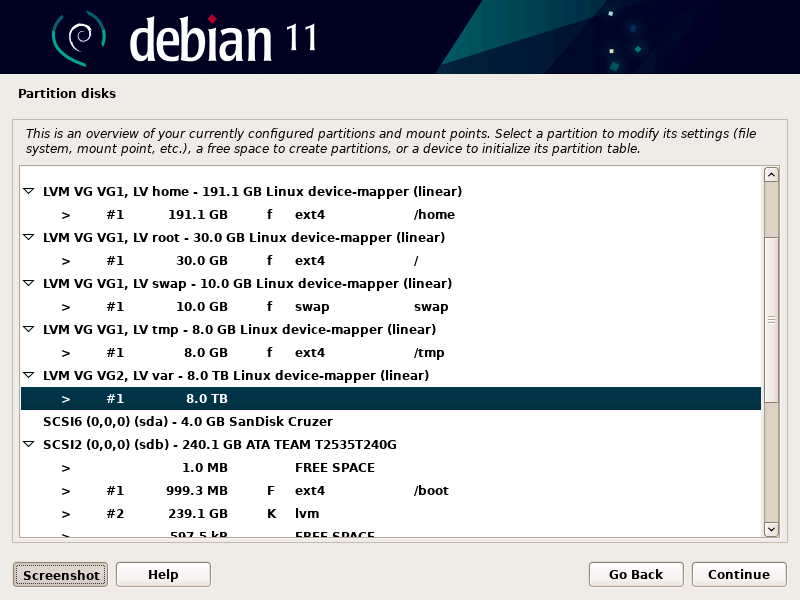
You will return to the Partition disks main menu. Now we must mount the Logical Volume we named var. Highlight the line showing the size of the var logical volume and click Continue.
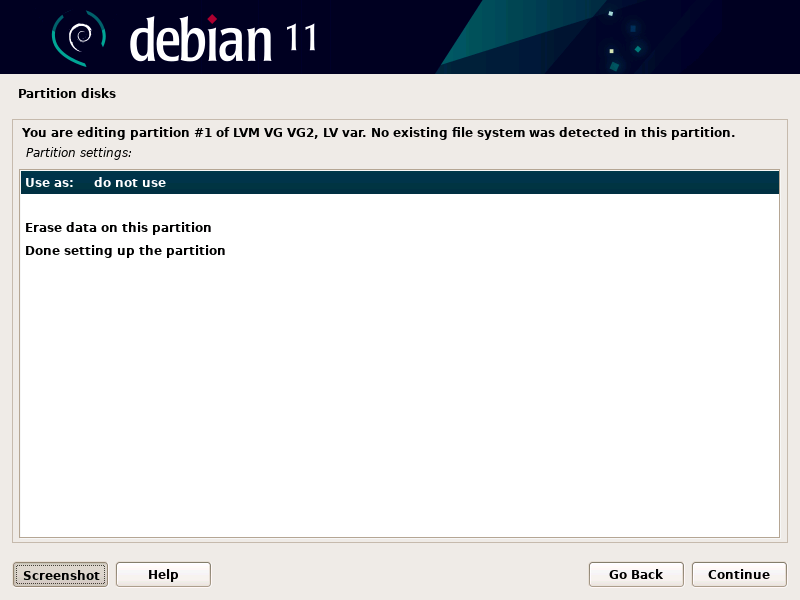
You are now at the Partition settings screen. First we must set the type of file system the partition will use. Highlight the ‘Use as: do not use’ line and click Continue.
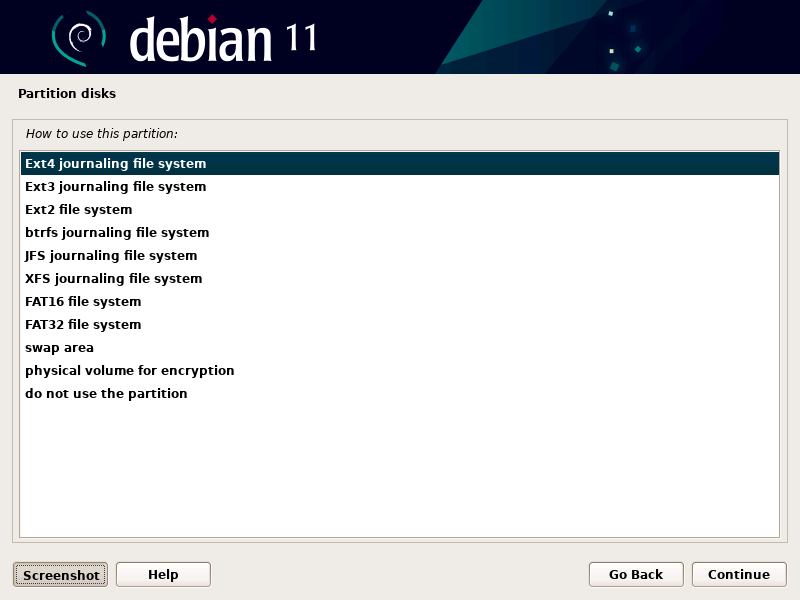
I recommend that you use Ext4 for all of your partitions except for the swap directory which can only use the swap area format. Select the file system type and then click Continue.
Now we must set the Mount point in the file system for the Logical Volume partition. Highlight Mount point and click Continue.
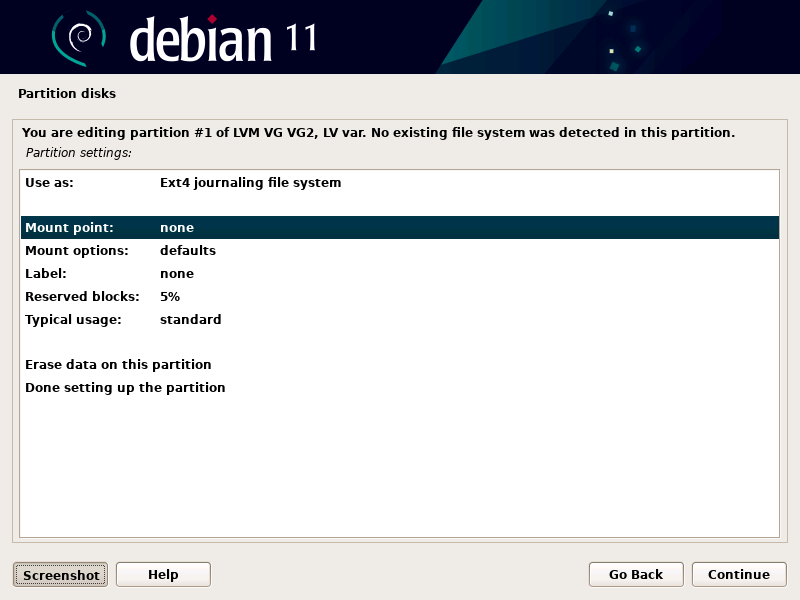
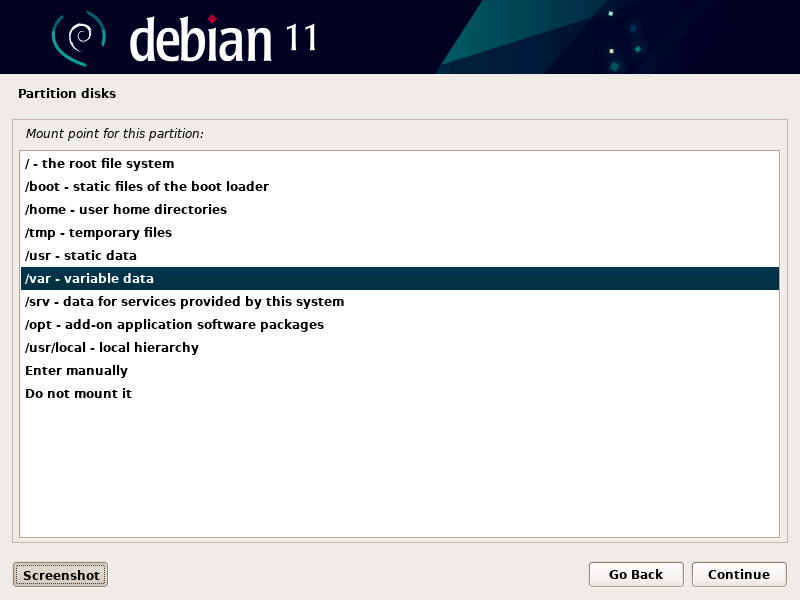
Select the ‘/var‘ Mount point for this partition and then click Continue.
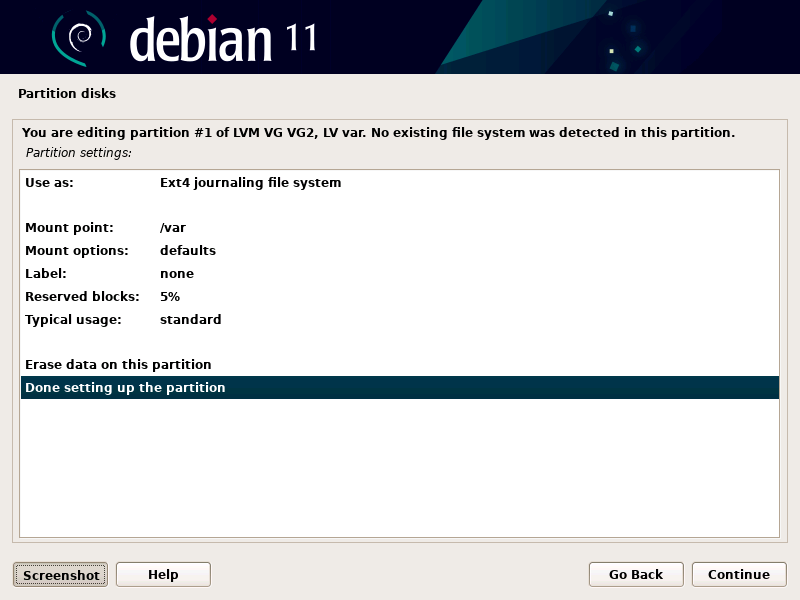
We are done configuring the partition, select Done setting up the partition and click Continue.
Write Changes To Disks
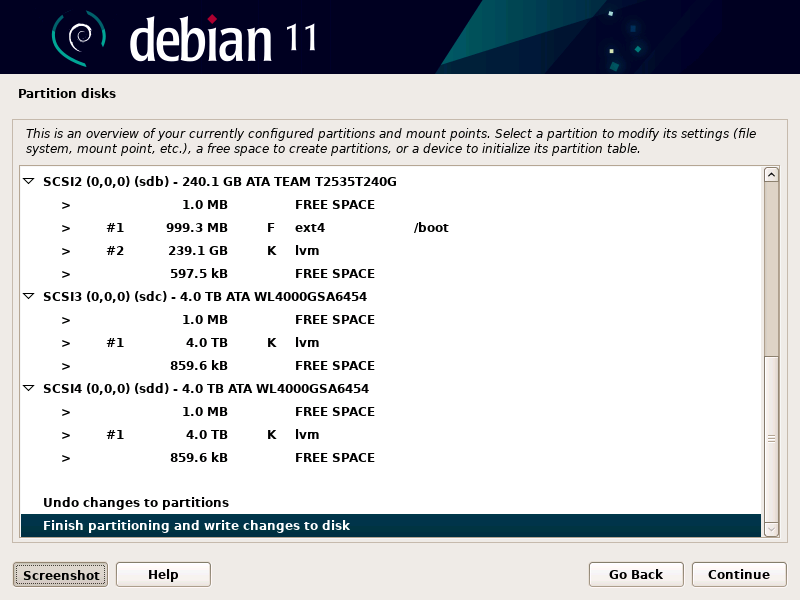
We have successfully configured the Debian 11 partitioning for our server. Select Finish partitioning and write changes to disk and then click Continue.
You will have to confirm writing the file system configuration you have created to the disks. To prevent accidentally overwriting existing data on the drive, the default is No.
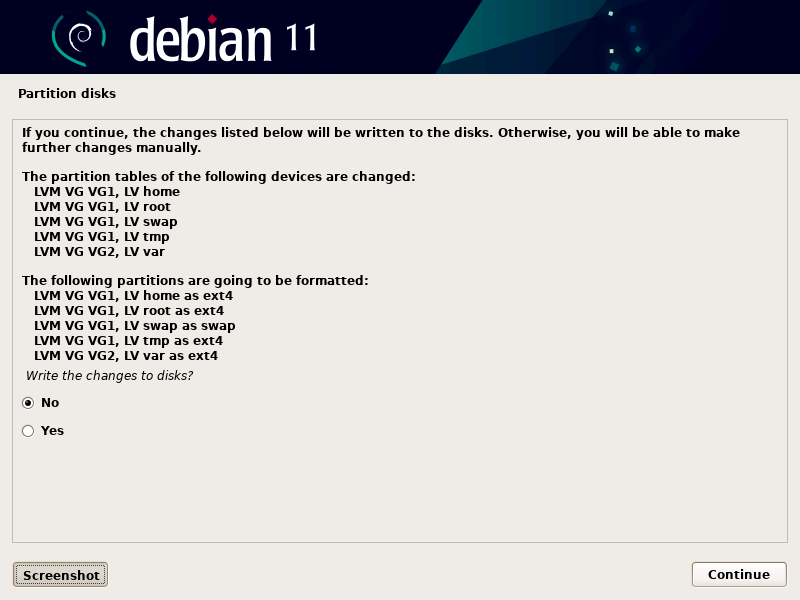
Select Yes and click Continue to write the changes to the disks.
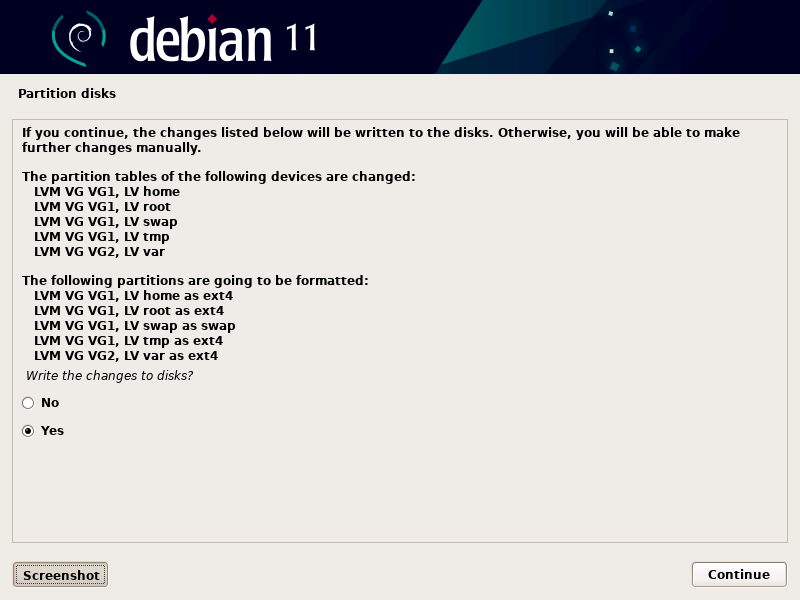
We have completed setting up the file system partitioning for our Debian 11 OS installation.

Recent Comments
Categories
Archives