A Tutorial To Build A Debian 11 Web Site Hosting Server Using Apache, BIND, Dovecot, MariaDb, PureFTPD and ISPConfig - Page: 6
By: Edward Kimmel
Page Quick Links
Install ISPConfig
5.01 Overview
ISPConfig is a control panel that allows users to easily administer their hosting accounts on Linux servers.
5.02 Download Latest Version Of ISPConfig
Change to the ‘/tmp’ directory and then download the latest version of ISPConfig using these commands:
cd /tmp

wget http://www.ispconfig.org/downloads/ISPConfig-3-stable.tar.gz
Now we need to unzip the downloaded file:
tar xfz ISPConfig-3-stable.tar.gz5.03 Install ISPConfig
Now we will change into the installation directory of the unzipped file:
cd ispconfig3_install/install/The next step is to run the ISPConfig installer:
php -q install.phpOnce the ISPConfig installer starts you will need to follow these steps to get ISPConfig installed.
root@server:/tmp# tar xfz ISPConfig-3-stable.tar.gz
root@server:/tmp# cd ispconfig3_install/install/
root@server:/tmp/ispconfig3_install/install# php -q install.php


--------------------------------------------------------------------------------
 _____ ___________   _____              __ _         ____
|_   _/  ___| ___ \ /  __ \            / _(_)       /__  \
  | | \ `--.| |_/ / | /  \/ ___  _ __ | |_ _  __ _    _/ /
  | |  `--. \  __/  | |    / _ \| '_ \|  _| |/ _` |  |_ |
 _| |_/\__/ / |     | \__/\ (_) | | | | | | | (_| | ___\ \
 \___/\____/\_|      \____/\___/|_| |_|_| |_|\__, | \____/
                                              __/ |
                                             |___/
--------------------------------------------------------------------------------


>> Initial configuration

Operating System: Debian 11.0 (Bullseye) or compatible

    Following will be a few questions for primary configuration so be careful.
    Default values are in [brackets] and can be accepted with <ENTER>.
    Tap in "quit" (without the quotes) to stop the installer.


Select language (en,de) [en]:  <-- Hit Enter

Installation mode (standard,expert) [standard]: expert  <-- Hit Enter

Full qualified hostname (FQDN) of the server, eg server1.domain.tld
[server.mydomain.com]:  <-- Hit Enter

MySQL server hostname [localhost]:  <-- Hit Enter

MySQL server port [3306]:  <-- Hit Enter

MySQL root username [root]:  <-- Hit Enter

MySQL root password []: MDbcfg4Me2@ccessU  <-- Hit Enter

MySQL database to create [dbispconfig]:  <-- Hit Enter

MySQL charset [utf8]:  <-- Hit Enter

The next two questions are about the internal ISPConfig database user and
password.
It is recommended to accept the defaults which are 'ispconfig' as username and a
random password.
If you use a different password, use only numbers and chars for the password.

ISPConfig mysql database username [ispconfig]:  <-- Hit Enter

ISPConfig mysql database password [ee03e213e0815f3d25090cecc857e484]:
ISPcfg4Me2@ccessU  <-- Hit Enter

Shall this server join an existing ISPConfig multiserver setup (y,n) [n]:
n  <-- Hit Enter

Adding ISPConfig server record to database.

Configure Mail (y,n) [y]: y  <-- Hit Enter

Configuring Postgrey
Configuring Postfix
Generating a RSA private key
..........................................................++++
writing new private key to 'smtpd.key'
-----
You are about to be asked to enter information that will be incorporated
into your certificate request.
What you are about to enter is what is called a Distinguished Name or a DN.
There are quite a few fields but you can leave some blank
For some fields there will be a default value,
If you enter '.', the field will be left blank.
-----
Country Name (2 letter code) [AU]:US  <-- Hit Enter
State or Province Name (full name) [Some-State]:Some-State  <-- Hit Enter
Locality Name (eg, city) []:Some-City  <-- Hit Enter
Organization Name (eg, company) [Internet Widgits Pty Ltd]:
MyDomain.com  <-- Hit Enter
Organizational Unit Name (eg, section) []:MyDomain.com Mail Server  <-- Hit Enter
Common Name (e.g. server FQDN or YOUR name) []:mail.mydomain.com  <-- Hit Enter
Email Address []:webmaster@mydomain.com  <-- Hit Enter
[WARN] autodetect for Mailman failed
Force configure Mailman (y,n) [n]: n  <-- Hit Enter

Skipping Mailman

Configuring Dovecot
Creating new DHParams file, this takes several minutes. Do not interrupt the script.
Configuring Spamassassin
Configuring Amavisd
Configuring Rspamd
Configuring Getmail
Configuring Jailkit
Configuring Pureftpd
Configure DNS Server (y,n) [y]: y  <-- Hit Enter

Configuring BIND
The Web Server option has to be enabled when you want run a web server or when
this node shall host the ISPConfig interface.
Configure Web Server (y,n) [y]: y  <-- Hit Enter

Configuring Apache
Configuring vlogger
[WARN] autodetect for OpenVZ failed
Force configure OpenVZ (y,n) [n]: n  <-- Hit Enter

Skipping OpenVZ

Configuring AppArmor
Configure Firewall Server (y,n) [y]: n  <-- Hit Enter

[WARN] autodetect for Metronome XMPP Server failed
Force configure Metronome XMPP Server (y,n) [n]: n  <-- Hit Enter

Skipping Metronome XMPP Server

Configuring Fail2ban
Install ISPConfig Web Interface (y,n) [y]: y  <-- Hit Enter

Installing ISPConfig
ISPConfig Port [8080]:  <-- Hit Enter

Admin password [c5169e8a]: ISPcfg4Me2AccessU  <-- Hit Enter

Re-enter admin password []: ISPcfg4Me2AccessU  <-- Hit Enter

Do you want a secure (SSL) connection to the ISPConfig web interface (y,n) [y]:
y  <-- Hit Enter

Checking / creating certificate for server.mydomain.com
Using certificate path /etc/letsencrypt/live/server.mydomain.com
Server's public ip(s) (24.101.44.223) not found in A/AAAA records for server.mydomain.com:
Ignore DNS check and continue to request certificate? (y,n) [n]: y  <-- Hit Enter

Using apache for certificate validation
acme.sh is installed, overriding certificate path to use /root/.acme.sh/server.mydomain.com
[Mon 10 Oct 2022 06:34:06 AM EDT] server.mydomain.com:Verify error:DNS problem:
NXDOMAIN looking up A for server.mydomain.com - check that a DNS record exists
for this domain; DNS problem: NXDOMAIN looking up AAAA for server.mydomain.com -
check that a DNS record exists for this domain
[Mon 10 Oct 2022 06:34:06 AM EDT] Please check log file for more details:
/var/log/ispconfig/acme.log
Issuing certificate via acme.sh failed. Please check that your hostname can be
verified by letsencrypt
Could not issue letsencrypt certificate, falling back to self-signed.
Generating a RSA private key
................................++++
.............++++
writing new private key to '/usr/local/ispconfig/interface/ssl/ispserver.key'
-----
You are about to be asked to enter information that will be incorporated
into your certificate request.
What you are about to enter is what is called a Distinguished Name or a DN.
There are quite a few fields but you can leave some blank
For some fields there will be a default value,
If you enter '.', the field will be left blank.
-----
Country Name (2 letter code) [AU]:US  <-- Hit Enter
State or Province Name (full name) [Some-State]:Some-State  <-- Hit Enter
Locality Name (eg, city) []:Some-City  <-- Hit Enter
Organization Name (eg, company) [Internet Widgits Pty Ltd]:
MyDomain.com  <-- Hit Enter
Organizational Unit Name (eg, section) []:MyDomain.com ISPConfig  <-- Hit Enter
Common Name (e.g. server FQDN or YOUR name) []:mydoamin.com  <-- Hit Enter
Email Address []:webmaster@mydomain.com  <-- Hit Enter
Symlink ISPConfig SSL certs to Postfix? (y,n) [y]: y  <-- Hit Enter

Symlink ISPConfig SSL certs to Pure-FTPd? Creating dhparam file may take some
time. (y,n) [y]: y  <-- Hit Enter

Generating DH parameters, 2048 bit long safe prime, generator 2
This is going to take a long time
............+..........+........................+...++*++*++*++*
Configuring Apps vhost
Configuring DBServer
Installing ISPConfig crontab
no crontab for getmail
Detect IP addresses
Restarting services ...
Installation completed.
root@server:/tmp/ispconfig3_install/install#
5.04 Open ISPConfig Port
Once the installation completes open the ISP Config login port in the firewall:
firewall-cmd --permanent --add-port=8080/tcp

firewall-cmd --reload
OPTIONAL: You can reboot the computer if you want.
reboot5.05 Confirm ISPConfig Login
Open a browser on your computer or a device connected to same network, log into ISPConfig (https://192.168.0.150:8080 or https://localhost:8080)
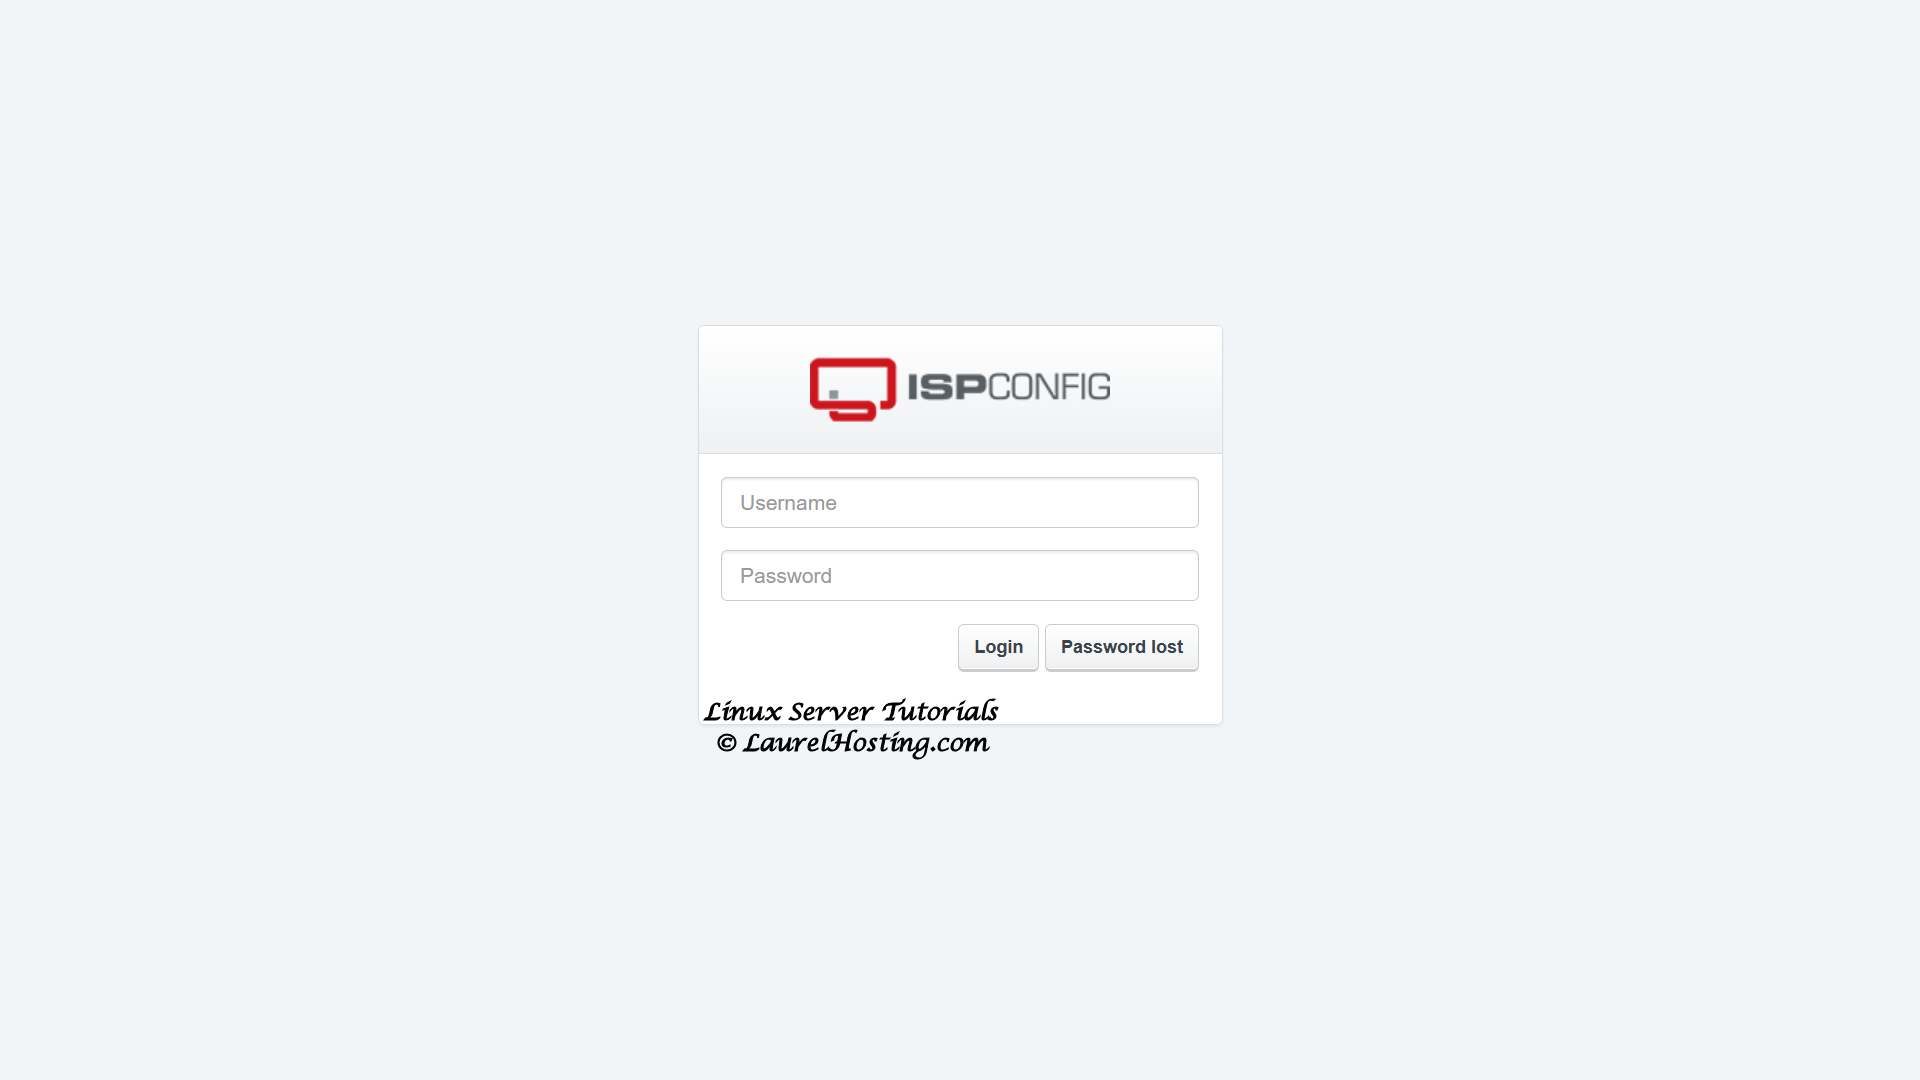
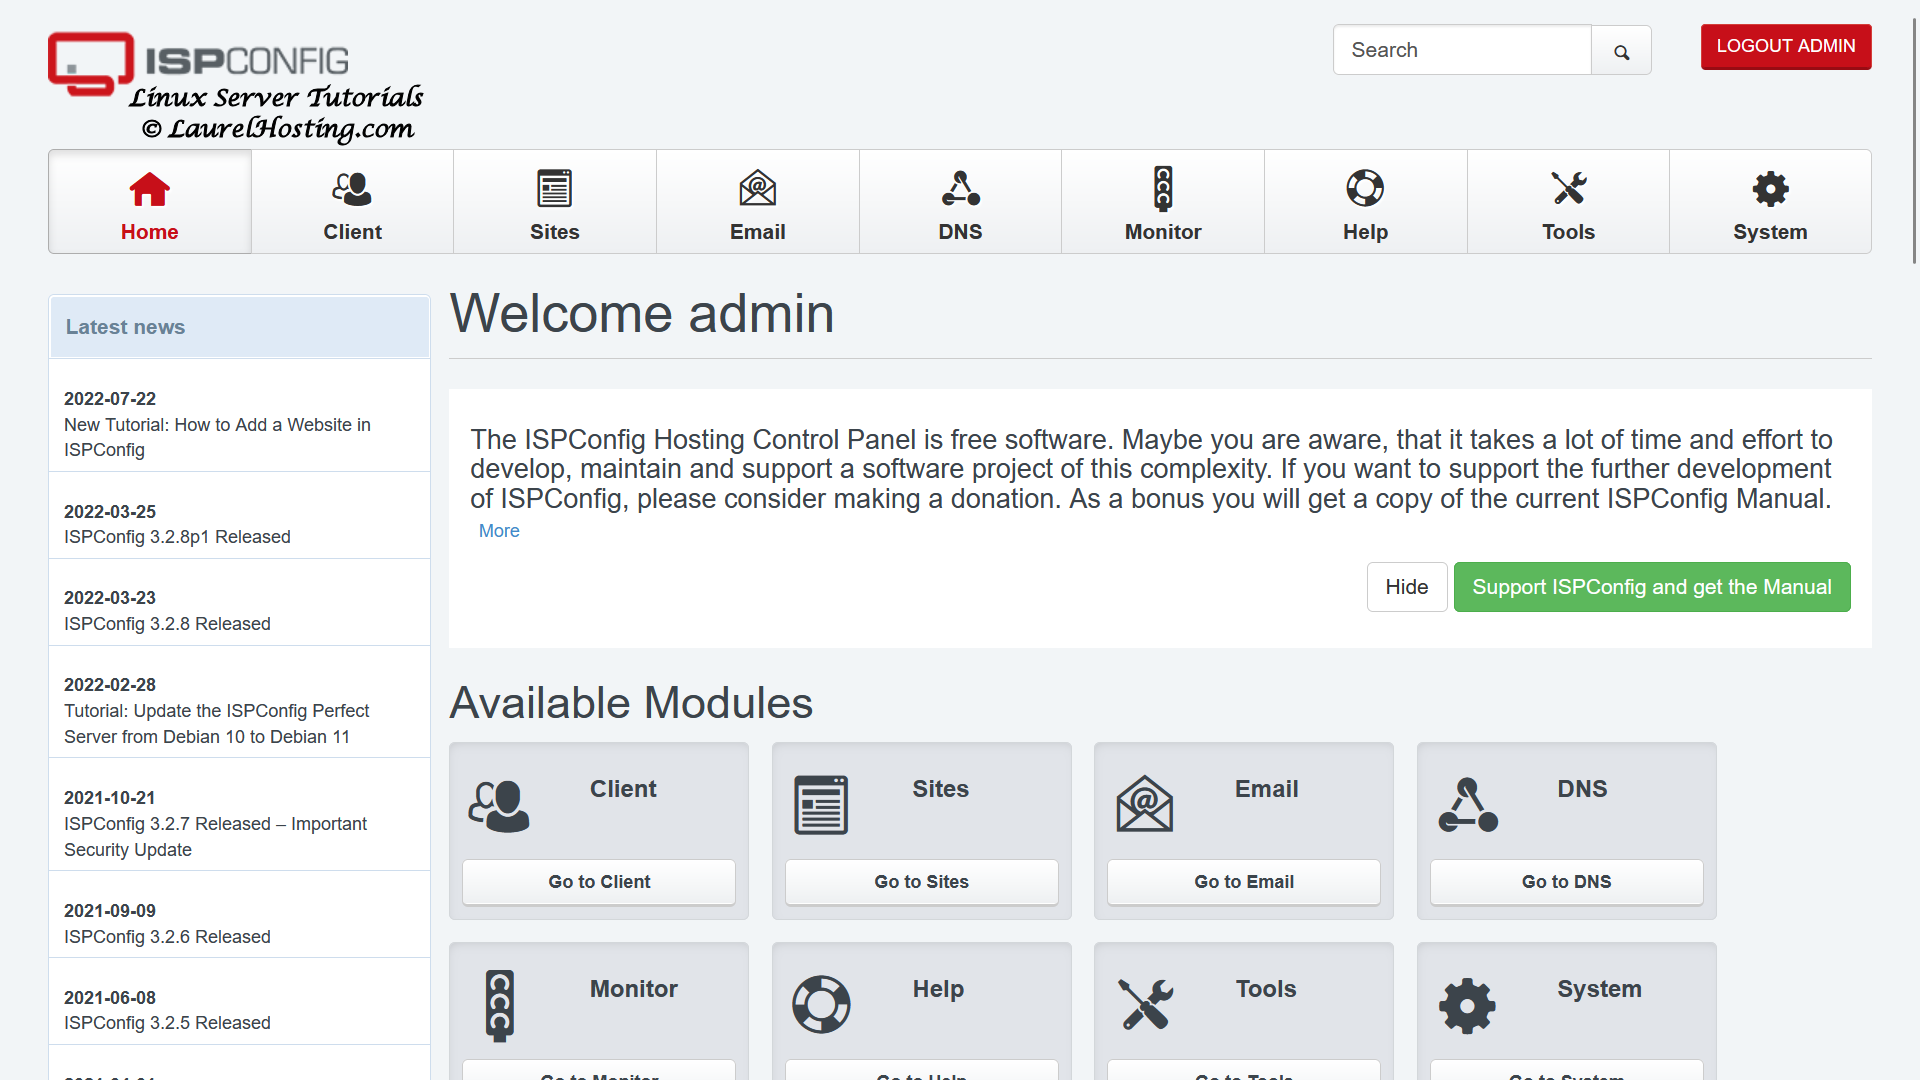
Enter ‘admin’ for the username and enter your password to confirm you can log in. You should see your dashboard home page.
5.06 Install Multiple Versions Of PHP
Now to install PHP 5.6 and 7.0 – 8.1 as PHP-FPM & FastCGI for ISPConfig 3 with apt on Debian 11.
The PHP version can later be selected in the ISPConfig 3 website settings for each site individually. This feature works with PHP-FPM and FastCGI. We will install PHP 5.6, 7.x and 8.x as a PHP-FPM and a FastCGI version on a Debian server by using the PHP packages from sury.org.
We will install PHP directly from Debian PHP Package maintainers site https://packages.sury.org/php/ with apt-get. This will not overwrite the existing installation but will change the default used PHP version to the newest installed one! So it is very important to add a new PHP version for the installed version to ISPConfig and change all sites to this version first. If you are using cron jobs calling PHP scripts you have to adapt them too, later more on that.
Because other packages as openssl are updated too, the installed packages from sury.org can not simply removed after installation. You first have to downgrade this packages to the Debian versions before you are able to remove the PHP packages without breaking other packages. The simplest way for me was to deactivate the new added repository, then installed packages from sury.org will apear as self created or deprecated packages in aptitude and you are able to downgrade package after package.
Please note that PHP-FPM can be used on both Apache and Nginx servers while FastCGI is available for Apache servers only.
5.07 Configure ISPConfig For Multiple PHP Versions
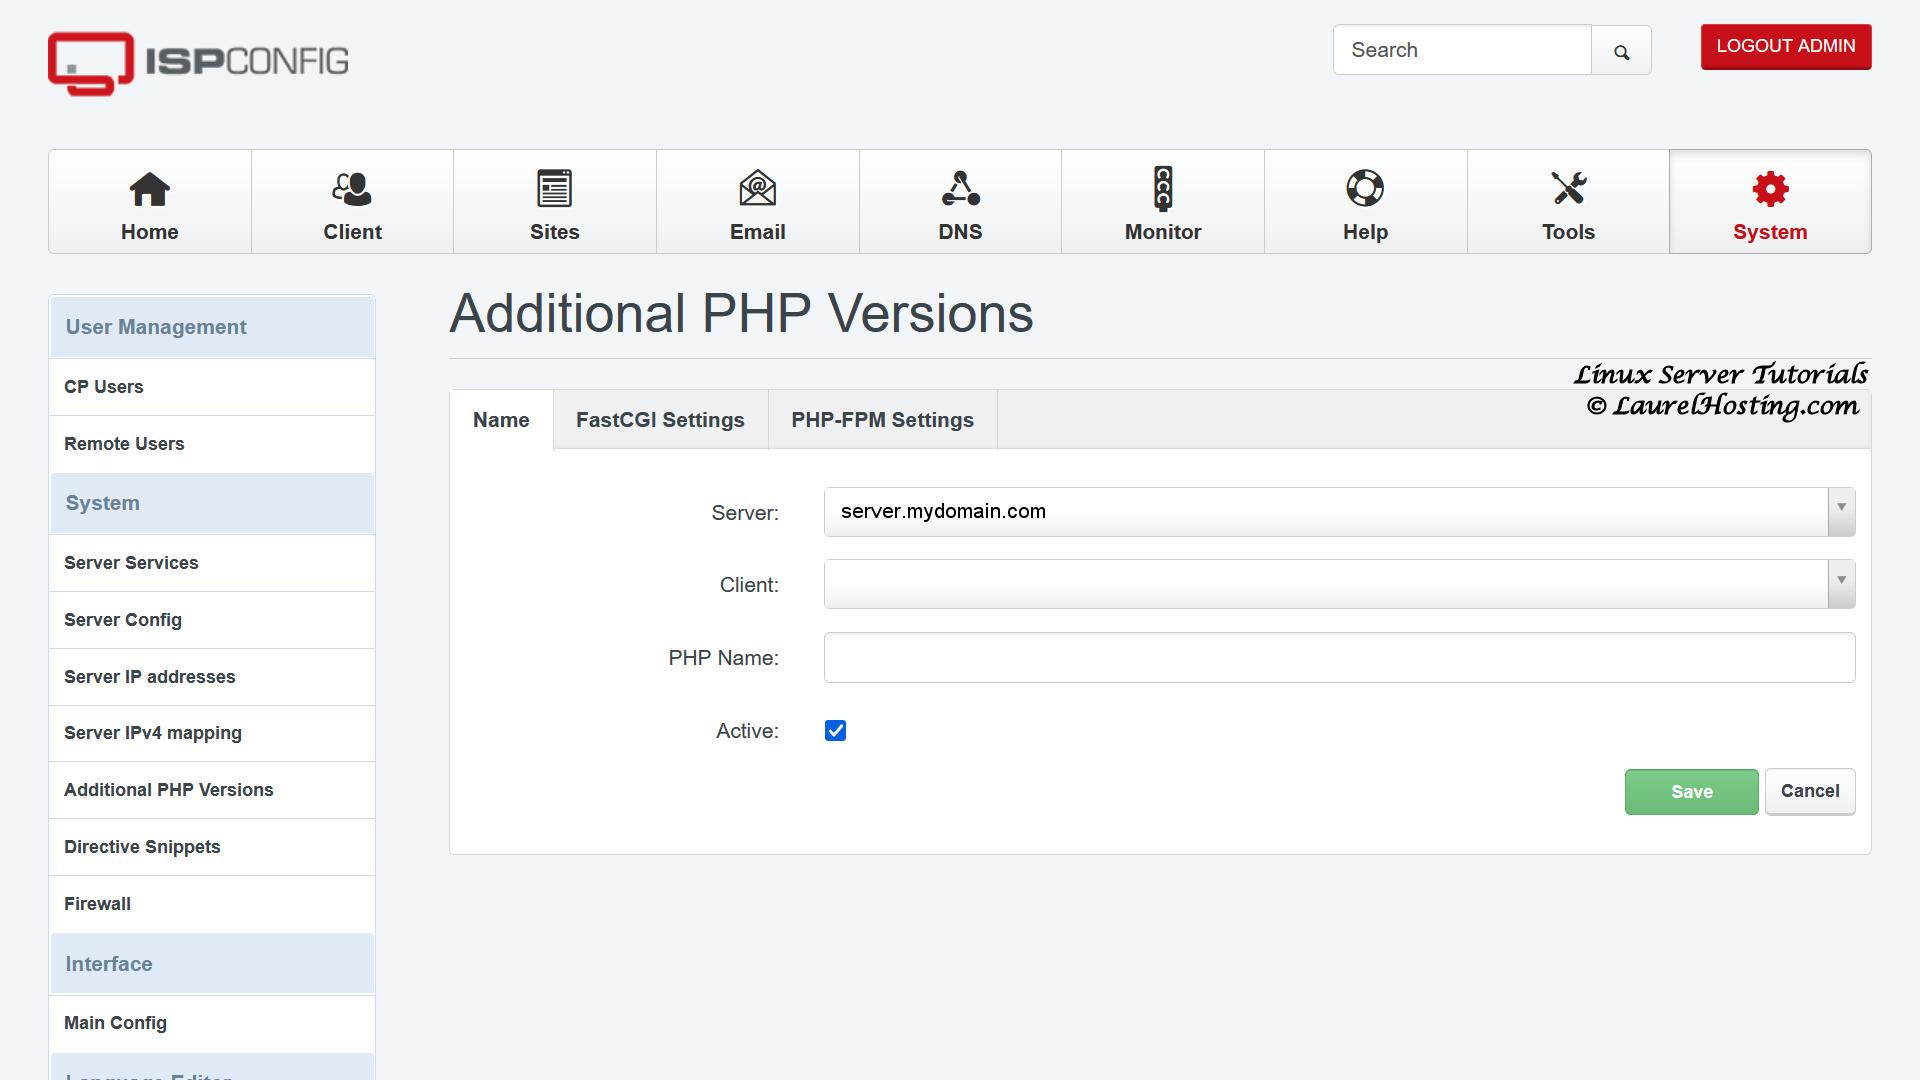
From the ISPConfig Dashboard Home Page Select System –> Additional PHP Versions –> Add new PHP version. You should see this screen:
Enter the name of the custom PHP version:
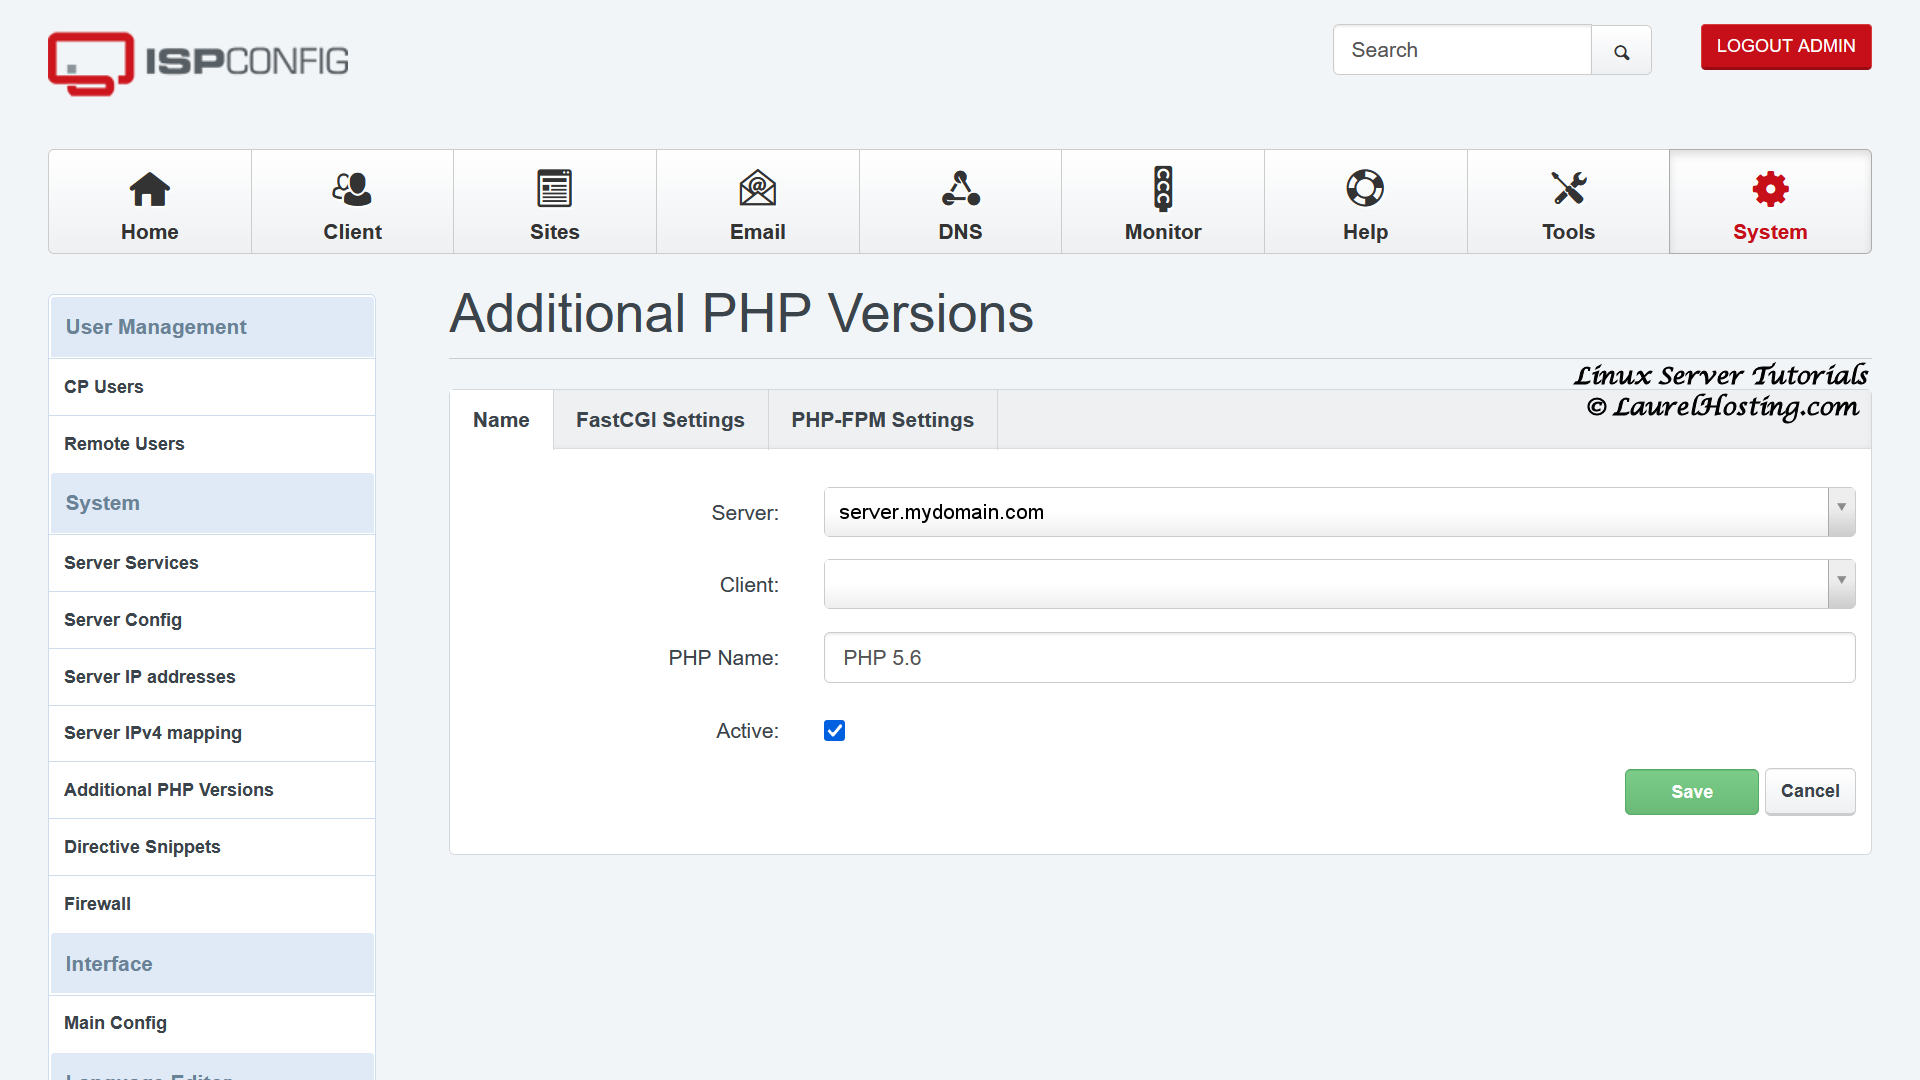
Click on the FastCGI Settings tab and fill out the fields as follows:
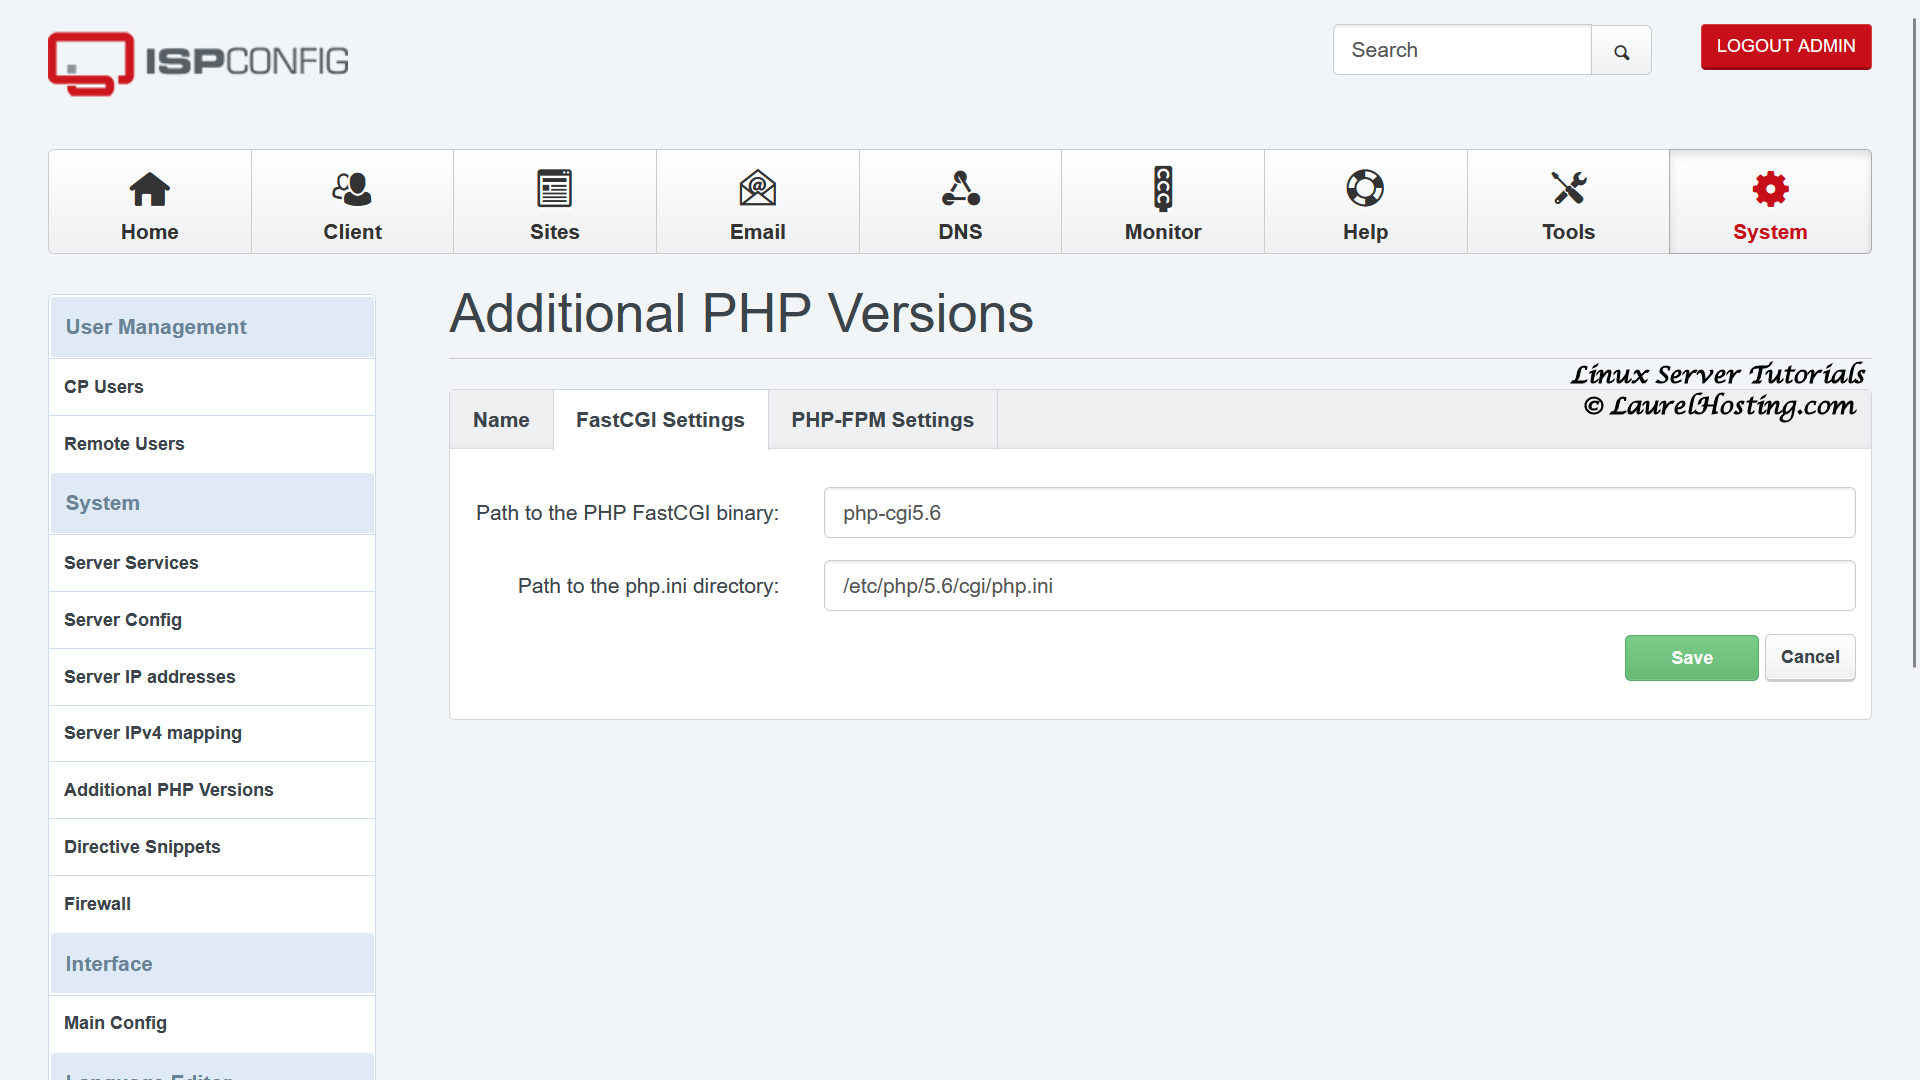
Path to the PHP FastCGI binary: Use settings from list below
Path to the php.ini directory: Use settings from list below
Then click on the PHP-FPM Settings tab and fill out the fields as follows:
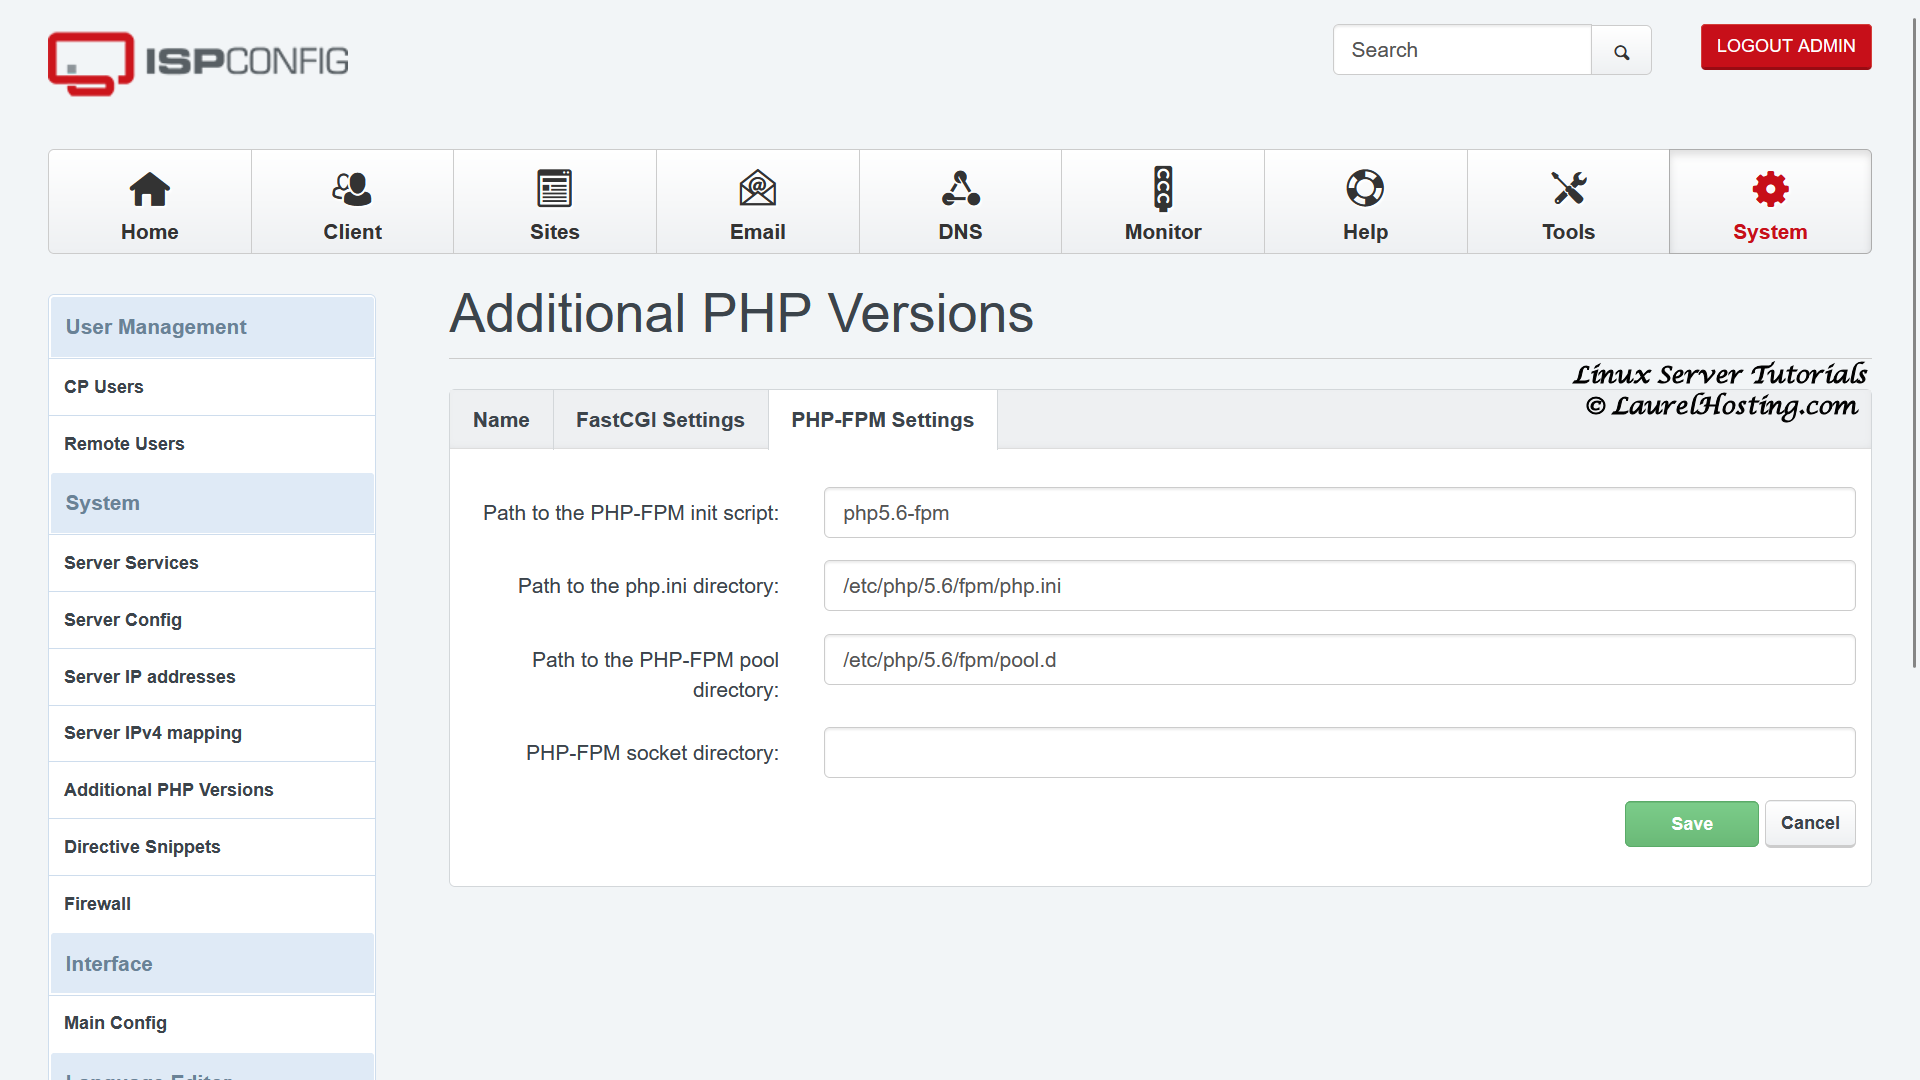
Path to the PHP-FPM init script: Use settings from list below
Path to the php.ini directory: Use settings from list below
Path to the PHP-FPM pool directory: Use settings from list below
Important step for cron jobs
If you use cron jobs calling PHP scripts you also have to tell cron which version to use. Add php7 in the beginning of the command to use the Debian’s version. If you are not sure what you exactly are using follow the symlink /usr/bin/php and use its final destination as prefix.
Add other PHP versions:
Currently there are 3 versions available at https://packages.sury.org/php/ and you have to repeat the last step now for every version you will install. I used the PHP 5.6 version settings in the example. Repeat the same steps to add PHP 7.0, PHP 7.1, PHP 7.2, PHP 7.3, PHP 7.4, PHP 8.0 and PHP 8.1. Use the following settings for each version installed:
Use These Settings For PHP 5.6:
PHP Name: PHP 5.6

Path to the PHP FastCGI binary: php-cgi5.6
Path to the php.ini directory: /etc/php/5.6/cgi/php.ini

Path to the PHP-FPM init script: php5.6-fpm
Path to the php.ini directory: /etc/php/5.6/fpm/php.ini
Path to the PHP-FPM pool directory: /etc/php/5.6/fpm/pool.d

The cli version for e.g. cron jobs has the name php5.6.
Use These Settings For PHP 7.0:
PHP Name: PHP 7.0

Path to the PHP FastCGI binary: php-cgi7.0
Path to the php.ini directory: /etc/php/7.0/cgi/php.ini

Path to the PHP-FPM init script: php7.0-fpm
Path to the php.ini directory: /etc/php/7.0/fpm/php.ini
Path to the PHP-FPM pool directory: /etc/php/7.0/fpm/pool.d

The cli version for e.g. cron jobs has the name php7.0.
Use These Settings For PHP 7.1:
PHP Name: PHP 7.1

Path to the PHP FastCGI binary: php-cgi7.1
Path to the php.ini directory: /etc/php/7.1/cgi/php.ini

Path to the PHP-FPM init script: php7.1-fpm
Path to the php.ini directory: /etc/php/7.1/fpm/php.ini
Path to the PHP-FPM pool directory: /etc/php/7.1/fpm/pool.d

The cli version for e.g. cron jobs has the name php7.1.
Use These Settings For PHP 7.2:
PHP Name: PHP 7.2

Path to the PHP FastCGI binary: php-cgi7.2
Path to the php.ini directory: /etc/php/7.2/cgi/php.ini

Path to the PHP-FPM init script: php7.2-fpm
Path to the php.ini directory: /etc/php/7.2/fpm/php.ini
Path to the PHP-FPM pool directory: /etc/php/7.2/fpm/pool.d

The cli version for e.g. cron jobs has the name php7.2.
Use These Settings For PHP 7.3:
PHP Name: PHP 7.3

Path to the PHP FastCGI binary: php-cgi7.3
Path to the php.ini directory: /etc/php/7.3/cgi/php.ini

Path to the PHP-FPM init script: php7.3-fpm
Path to the php.ini directory: /etc/php/7.3/fpm/php.ini
Path to the PHP-FPM pool directory: /etc/php/7.3/fpm/pool.d

The cli version for e.g. cron jobs has the name php7.3.
Use These Settings For PHP 7.4:
PHP Name: PHP 7.4

Path to the PHP FastCGI binary: php-cgi7.4
Path to the php.ini directory: /etc/php/7.4/cgi/php.ini

Path to the PHP-FPM init script: php7.4-fpm
Path to the php.ini directory: /etc/php/7.4/fpm/php.ini
Path to the PHP-FPM pool directory: /etc/php/7.4/fpm/pool.d

The cli version for e.g. cron jobs has the name php7.4.
Use These Settings For PHP 8.0:
PHP Name: PHP 8.0

Path to the PHP FastCGI binary: php-cgi8.0
Path to the php.ini directory: /etc/php/8.0/cgi/

Path to the PHP-FPM init script: php8.0-fpm
Path to the php.ini directory: /etc/php/8.0/fpm/
Path to the PHP-FPM pool directory: /etc/php/8.0/fpm/pool.d

The cli version for e.g. cron jobs has the name php8.0.
Use These Settings For PHP 8.1:
PHP Name: PHP 8.1

Path to the PHP FastCGI binary: php-cgi8.1
Path to the php.ini directory: /etc/php/8.1/cgi/

Path to the PHP-FPM init script: php8.1-fpm
Path to the php.ini directory: /etc/php/8.1/fpm/
Path to the PHP-FPM pool directory: /etc/php/8.1/fpm/pool.d

The cli version for e.g. cron jobs has the name php8.1.
5.08 Add packages.sury.com Repository
Add the repository at packages.sury.org
To add the repository at packages.sury.org and its BGP keys to apt use these commands:
apt-get install -y apt-transport-https lsb-release ca-certificates

sh -c 'echo "deb https://packages.sury.org/php/ $(lsb_release -sc) main" > /etc/apt/sources.list.d/php.list'
Importing the GPG key for the repository by the below-mentioned command:
wget -O /etc/apt/trusted.gpg.d/php.gpg https://packages.sury.org/php/apt.gpg

apt-get update
5.09 Install Each PHP Version From packages.sury.com
Install PHP 5.6
To install PHP 5.6 use this command:
apt-get install -y php5.6 php5.6-cli php5.6-cgi php5.6-fpm php5.6-gd php5.6-mysql php5.6-imap php5.6-curl php5.6-intl php5.6-pspell php5.6-recode php5.6-sqlite3 php5.6-tidy php5.6-xmlrpc php5.6-xsl php5.6-zip php5.6-mbstring php5.6-soap php5.6-opcache php5.6-common php5.6-json php5.6-readline php5.6-xml
Install PHP 7.0
To install PHP 7.0 use this command:
apt-get install -y php7.0 php7.0-cli php7.0-cgi php7.0-fpm php7.0-gd php7.0-mysql php7.0-imap php7.0-curl php7.0-intl php7.0-pspell php7.0-recode php7.0-sqlite3 php7.0-tidy php7.0-xmlrpc php7.0-xsl php7.0-zip php7.0-mbstring php7.0-soap php7.0-opcache php7.0-common php7.0-json php7.0-readline php7.0-xml
Install PHP 7.1
To install PHP 7.1 use this command:
apt-get install -y php7.1 php7.1-cli php7.1-cgi php7.1-fpm php7.1-gd php7.1-mysql php7.1-imap php7.1-curl php7.1-intl php7.1-pspell php7.1-recode php7.1-sqlite3 php7.1-tidy php7.1-xmlrpc php7.1-xsl php7.1-zip php7.1-mbstring php7.1-soap php7.1-opcache php7.1-common php7.1-json php7.1-readline php7.1-xml
Install PHP 7.2
To install PHP 7.2 use this command:
apt-get install -y php7.2 php7.2-cli php7.2-cgi php7.2-fpm php7.2-gd php7.2-mysql php7.2-imap php7.2-curl php7.2-intl php7.2-pspell php7.2-recode php7.2-sqlite3 php7.2-tidy php7.2-xmlrpc php7.2-xsl php7.2-zip php7.2-mbstring php7.2-soap php7.2-opcache php7.2-common php7.2-json php7.2-readline php7.2-xml
Install PHP 7.3
To install PHP 7.3 use this command:
apt-get install -y php7.3 php7.3-cli php7.3-cgi php7.3-fpm php7.3-gd php7.3-mysql php7.3-imap php7.3-curl php7.3-intl php7.3-pspell php7.3-recode php7.3-sqlite3 php7.3-tidy php7.3-xmlrpc php7.3-xsl php7.3-zip php7.3-mbstring php7.3-soap php7.3-opcache php7.3-common php7.3-json php7.3-readline php7.3-xml
Install PHP 7.4
To install PHP 7.4 use this command:
apt-get install -y php7.4 php7.4-cli php7.4-cgi php7.4-fpm php7.4-gd php7.4-mysql php7.4-imap php7.4-curl php7.4-intl php7.4-pspell php7.4-sqlite3 php7.4-tidy php7.4-xmlrpc php7.4-xsl php7.4-zip php7.4-mbstring php7.4-soap php7.4-opcache libonig5 php7.4-common php7.4-json php7.4-readline php7.4-xml
Install PHP 8.0
To install PHP 8.0 use this command:
apt-get install -y php8.0 php8.0-cli php8.0-cgi php8.0-fpm php8.0-gd php8.0-mysql php8.0-imap php8.0-curl php8.0-intl php8.0-pspell php8.0-sqlite3 php8.0-tidy php8.0-xsl php8.0-zip php8.0-mbstring php8.0-soap php8.0-opcache libonig5 php8.0-common php8.0-readline php8.0-xml
Install PHP 8.1
To install PHP 8.1 use this command:
apt-get install -y php8.1 php8.1-cli php8.1-cgi php8.1-fpm php8.1-gd php8.1-mysql php8.1-imap php8.1-curl php8.1-intl php8.1-pspell php8.1-sqlite3 php8.1-tidy php8.1-xsl php8.1-zip php8.1-mbstring php8.1-soap php8.1-opcache libonig5 php8.1-common php8.1-readline php8.1-xml
5.10 Make PHP 7.4 Default
Set Debian default PHP back to the original version
For Debian 11, choose 7.4 in the dialog that appears.
The default PHP of the operating system has to remain at the original version. To fix that, run these commands:
update-alternatives --config phproot@server:~# update-alternatives –config php
There are 7 choices for the alternative php (providing /usr/bin/php).
Selection Path Priority Status
————————————————————
* 0 /usr/bin/php8.1 81 auto mode
1 /usr/bin/php5.6 56 manual mode
2 /usr/bin/php7.0 70 manual mode
3 /usr/bin/php7.1 71 manual mode
4 /usr/bin/php7.2 72 manual mode
5 /usr/bin/php7.3 73 manual mode
6 /usr/bin/php7.4 74 manual mode
7 /usr/bin/php8.0 80 manual mode
8 /usr/bin/php8.1 81 manual mode
Press to keep the current choice[*], or type selection number: 6 <-- Hit Enter
update-alternatives: using /usr/bin/php7.4 to provide /usr/bin/php (php) in manual mode
root@server:~#update-alternatives --config php-cgiroot@server:~# update-alternatives –config php-cgi
There are 7 choices for the alternative php-cgi (providing /usr/bin/php-cgi).
Selection Path Priority Status
————————————————————
* 0 /usr/bin/php-cgi8.1 81 auto mode
1 /usr/bin/php-cgi5.6 56 manual mode
2 /usr/bin/php-cgi7.0 70 manual mode
3 /usr/bin/php-cgi7.1 71 manual mode
4 /usr/bin/php-cgi7.2 72 manual mode
5 /usr/bin/php-cgi7.3 73 manual mode
6 /usr/bin/php-cgi7.4 74 manual mode
7 /usr/bin/php-cgi8.0 80 manual mode
8 /usr/bin/php-cgi8.1 81 manual mode
Press to keep the current choice[*], or type selection number: 6 <-- Hit Enter
update-alternatives: using /usr/bin/php-cgi7.4 to provide /usr/bin/php-cgi (php-cgi) in manual mode
root@server:~#5.11 Edit php.ini Configuration File
Now we have to edit the php.ini file in each PHP version that was installed. First we edit the default version located at /etc/php/7.4/apache2/php.ini:
We need to enable php shorthand tags and change the error reporting (so that notices aren’t shown any longer), uncomment cgi.fix_pathinfo=1, set the timezone and set the path to browscap.ini:
nano /etc/php/7.4/apache2/php.ini[…]
; This directive determines whether or not PHP will recognize code between
; tags as PHP source which should be processed as such. It is
; generally recommended that should be used and that this feature
; should be disabled, as enabling it may result in issues when generating XML
; documents, however this remains supported for backward compatibility reasons.
; Note that this directive does not control the ; used regardless of this directive.
; Default Value: On
; Development Value: Off
; Production Value: Off
; http://php.net/short-open-tag
;short_open_tag = Off
short_open_tag = On
[…]
[…]
;error_reporting = E_ALL & ~E_DEPRECATED
error_reporting = E_ALL & ~E_NOTICE & ~E_DEPRECATED & ~E_STRICT
[…]
[…]
; cgi.fix_pathinfo provides *real* PATH_INFO/PATH_TRANSLATED support for CGI. PHP’s
; previous behaviour was to set PATH_TRANSLATED to SCRIPT_FILENAME, and to not grok
; what PATH_INFO is. For more information on PAppp.tldTH_INFO, see the cgi specs. Setting
; this to 1 will cause PHP CGI to fix its paths to conform to the spec. A setting
; of zero causes PHP to behave as before. Default is 1. You should fix your scripts
; to use SCRIPT_FILENAME rather than PATH_TRANSLATED.
; http://www.php.net/manual/en/ini.core.php#ini.cgi.fix-pathinfo
cgi.fix_pathinfo=1
[…]
[…]
date.timezone = 'America/New_York'
[…]
[…]
browscap]
; http://php.net/browscap
;browscap = extra/browscap.ini
browscap = /etc/php/browscap.ini
[…] Close and save the file.
Now we must copy this edited version to all of the other installed versions:
cp /etc/php/7.4/apache2/php.ini /etc/php/5.6/cgi/php.ini

cp /etc/php/7.4/apache2/php.ini /etc/php/5.6/fpm/php.ini

cp /etc/php/7.4/apache2/php.ini /etc/php/5.6/cli/php.ini

cp /etc/php/7.4/apache2/php.ini /etc/php/7.0/cgi/php.ini

cp /etc/php/7.4/apache2/php.ini /etc/php/7.0/fpm/php.ini

cp /etc/php/7.4/apache2/php.ini /etc/php/7.0/cli/php.ini

cp /etc/php/7.4/apache2/php.ini /etc/php/7.1/cgi/php.ini

cp /etc/php/7.4/apache2/php.ini /etc/php/7.1/fpm/php.ini

cp /etc/php/7.4/apache2/php.ini /etc/php/7.1/cli/php.ini

cp /etc/php/7.4/apache2/php.ini /etc/php/7.2/cgi/php.ini

cp /etc/php/7.4/apache2/php.ini /etc/php/7.2/fpm/php.ini

cp /etc/php/7.4/apache2/php.ini /etc/php/7.2/cli/php.ini

cp /etc/php/7.4/apache2/php.ini /etc/php/7.3/cgi/php.ini

cp /etc/php/7.4/apache2/php.ini /etc/php/7.3/fpm/php.ini

cp /etc/php/7.4/apache2/php.ini /etc/php/7.3/cli/php.ini

cp /etc/php/7.4/apache2/php.ini /etc/php/7.4/cgi/php.ini

cp /etc/php/7.4/apache2/php.ini /etc/php/7.4/fpm/php.ini

cp /etc/php/7.4/apache2/php.ini /etc/php/7.4/cli/php.ini

cp /etc/php/7.4/apache2/php.ini /etc/php/8.0/cgi/php.ini

cp /etc/php/7.4/apache2/php.ini /etc/php/8.0/fpm/php.ini

cp /etc/php/7.4/apache2/php.ini /etc/php/8.0/cli/php.ini

cp /etc/php/7.4/apache2/php.ini /etc/php/8.1/cgi/php.ini

cp /etc/php/7.4/apache2/php.ini /etc/php/8.1/fpm/php.ini

cp /etc/php/7.4/apache2/php.ini /etc/php/8.1/cli/php.ini
Download the PHP version of “browscap.ini” you want to use from http://browscap.org and save it into /etc/php directory. There are 3 versions you can use, php_browscap.ini, full_php_browscap.ini and lite_browscap.ini.
cd /tmp
To use the Standard File:
wget https://browscap.org/stream?q=PHP_BrowsCapINI
cp ‘stream?q=PHP_BrowsCapINI’ /etc/php/browscap.ini
To use the Full File:
wget https://browscap.org/stream?q=Full_PHP_BrowsCapINI
cp ‘stream?q=Full_PHP_BrowsCapINI’ /etc/php/browscap.ini
To use the Lite File:
wget https://browscap.org/stream?q=Lite_PHP_BrowsCapINI
cp ‘stream?q=Lite_PHP_BrowsCapINI’ /etc/php/browscap.ini
Now restart Apache:
systemctl restart apache2Finally, restart the php-fpm daemons. Run the commands for the previously installed ones:
service php5.6-fpm restart

service php7.0-fpm restart

service php7.1-fpm restart

service php7.2-fpm restart

service php7.3-fpm restart

service php7.4-fpm restart

service php8.0-fpm restart

service php8.1-fpm restart
And that completes the setup procedures of your Web Site Hosting Server using Debian 11 and ISPConfig 3.1. Now we need to Configure ISPConfig to host the MyDomain.com website using WordPress 6.0 content management system.

Recent Comments
Categories
Archives